While texture mapping is a nice way of simulating surface textures without additional geometry, we can further embellish the appearance by blending multiple textures together on the same surface using multi-texturing. In this lab we will see how to apply multi-texturing through programmable shaders.
0. Getting Started
Download CS370_Lab21.zip, saving it into the labs directory.
Double-click on CS370_Lab21.zip and extract the contents of the archive into a subdirectory called CS370_Lab21
Navigate into the CS370_Lab21 directory and double-click on CS370_Lab21.sln (the file with the little Visual Studio icon with the 12 on it).
If the source file is not already open in the main window, open the source files by expanding the Source Files item in the Solution Explorer window and double-clicking dirtBall.cpp, dirtvert.vs, and dirtfrag.fs.
1. Associating Texture Maps in Shaders
Since we are using several textures, we will need to have several sampler shader variables. We do this similar to other global variables by declaring a uniform sampler2D variable in the fragment shader. As before, we then associate the sampler with an application identifier using
param = glGetUniformLocation(progObj,"var");
where param is an application GLuint identifier, progObj is the shader program object and var is the name of the shader global variable (again enclosed in double quotes).
Tasks
- Add code to dirtfrag.fs to add two global uniform sampler2D variables named texMap and dirtMap.
- Add code to the application main() to associate texMap with texSampler[BALL_UNIT] (use glGetUniformLocation()).
- Add code to the application main() to associate dirtMap with texSampler[DIRT_UNIT] (use glGetUniformLocation()).
2. Multi-Texturing
First we will need to set the corresponding texture unit number (0 for a single texture) in the application for the textures units we are using via
glUniform1i(param, num);
where param is the associated texSampler[] identifier from above and num is the number of the texture unit to attach, e.g. 0, 1, etc (often stored in a symbolic constant for easier readability).
Applying several textures to a polygon is then accomplished through a process known as multi-texturing. The first texture will be applied in the standard fashion as we have done so far. The additional textures, however, will then be blended with the first to produce an enhanced effect, e.g. battle damage. After the textures are loaded (identically as before using SOIL), the mult-texturing process is accomplished by first activating several texture units (one per texture) via the command:
glActiveTexture(texture_unit);
where texture_unit is the texture unit identifier, e.g. GL_TEXTURE0, GL_TEXTURE1, etc. Once a texture unit is activated, we can then bind the desired texture to the texture unit using glBindTexture( ).
Then we assign texture coordinates for each texture unit (per vertex), i.e. multi-texture coordinates, using the command:
glMultiTexCoord2f(texture, s, t);
where texture is the texture unit identifier (described above) and s, t are the desired texture coordinates to be assigned to the vertex.
Tasks
- Add code to render_Scene( ) to use the dirtProg shader program.
- Add code to render_Scene( ) to associate texture unit 0 (identified by BALL_UNIT) with the corresponding texSampler[ ] value.
- Add code to render_Scene( ) to make GL_TEXTURE0 active.
- Add code to render_Scene( ) to bind the BALL texture into texture unit 0.
- Add code to render_Scene( ) to associate texture unit 1 (identified by DIRT_UNIT) with the corresponding texSampler[ ] value.
- Add code to render_Scene( ) to make GL_TEXTURE1 active.
- Add code to render_Scene( ) to bind the DIRT texture into texture unit 1 if the use_dirt flag is set or the BLANK texture otherwise.
- Add code to render_Scene( ) to set texture coordinates for both texture units (you'll need one call to glMultiTexCoord2f( ) for each texture unit) to [0,0], [1,0], [1,1], [0,1].
- Add code to keyfunc( ) to toggle the use_dirt flag when the spacebar is pressed.
3. Using Texture Maps in Shaders
Like other built-in shader variables, GLSL provides a (varying vec4) array for texture coordinates assigned to vertices in the application called gl_TexCoord[ ] (where the index represents a corresponding texture unit) which is then (modified and/or) passed from the vertex shader to the fragment shader. It also has built in variables for multi-texture coordinates in the variables gl_MultiTexCoord{0,1,...} for each texture unit number.
Finally in the fragment shader, we obtain the color from the sampler using the command
texColor = texture2D(sampler, gl_TexCoord[i].st);
where texColor is a local vec4 shader variable, sampler is the global sampler variable (associated with the desired texture map in section 2 above), i is the desired texture coordinate passed from the vertex shader (note we only use the .st components since we are only using 2D textures). At this point we are free to manipulate the color as desired and finally assign the result to gl_FragColor.
Tasks
- Add code to dirtvert.vs in main( ) to set gl_TexCoord[0] to gl_MultiTexCoord0.
- Add code to dirtvert.vs in main( ) to set gl_TexCoord[1] to gl_MultiTexCoord1.
- Add code to dirtfrag.fs in main( ) to create a vec4 variable named texColor and set it from texMap using gl_TexCoord[0] (using texture2D()).
- Add code to dirtfrag.fs in main( ) to create a vec4 variable named dirtColor and set it from dirtMap using gl_TexCoord[1] (using texture2D()).
- Add code to dirtfrag.fs in main( ) to create a vec4 variable named color and set it to the product of baseColor, texColor, and dirtColor. Note that we have also blended in a base color that was passed to the application using the gl_Color shader variable in the vertex shader and then sent to the fragment shader using a varying variable named baseColor. In this lab we simply set the underlying color to be white, but could have computed it in the vertex shader based on lighting, etc.
- Add code to dirtfrag.fs in main() to set gl_FragColor to color.
Compiling and running the program
Once you have completed typing in the code, you can build and run the program in one of two ways:
- Click the small green arrow in the middle of the top toolbar
- Hit F5 (or Ctrl-F5)
(On Linux/OSX: In a terminal window, navigate to the directory containing the source file and simply type make. To run the program type ./dirtBall.exe)
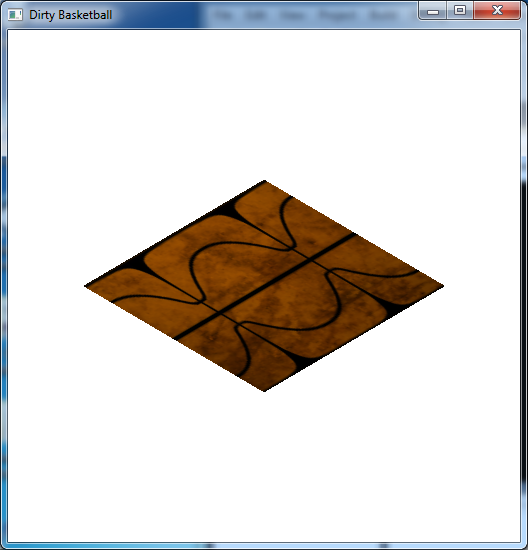
The output should look similar to below
To quit the program simply close the window.
The multi-texturing process when used with shaders can use the textures to represent surface geometry variations that interact with lighting to produce one final effect we will investigate next known as bump mapping. In this effect we apply per pixel lighting rather than per vertex lighting to give a much more convincing surface appearance.
