Due: Friday, Feb 28th by 11:59 PM
This is an individual assignment
Getting Started
Download CS496_Assign02.zip and CS496_Assign02_WebService.zip and import them into the Eclipse workspace you use for Android development. (Use the ADT version of Eclipse.) Also download and import CS496_Jetty.zip if it is not already in your workspace.
This assignment consists of creating a mobile client to access the inventory web service created in Assignment 1. Hence the same Item model object will be used in order to maintain JSON compatibility.
Your Tasks
Your tasks involve:
- Creating a mobile UI that allows the user to enter relevant information to either retrieve, modify, or delete items from the inventory.
- Add corresponding mobile controllers to send RESTful API operation requests to the server.
- Process any appropriate responses from the server to be display results in the mobile app.
Implementing the Mobile Client
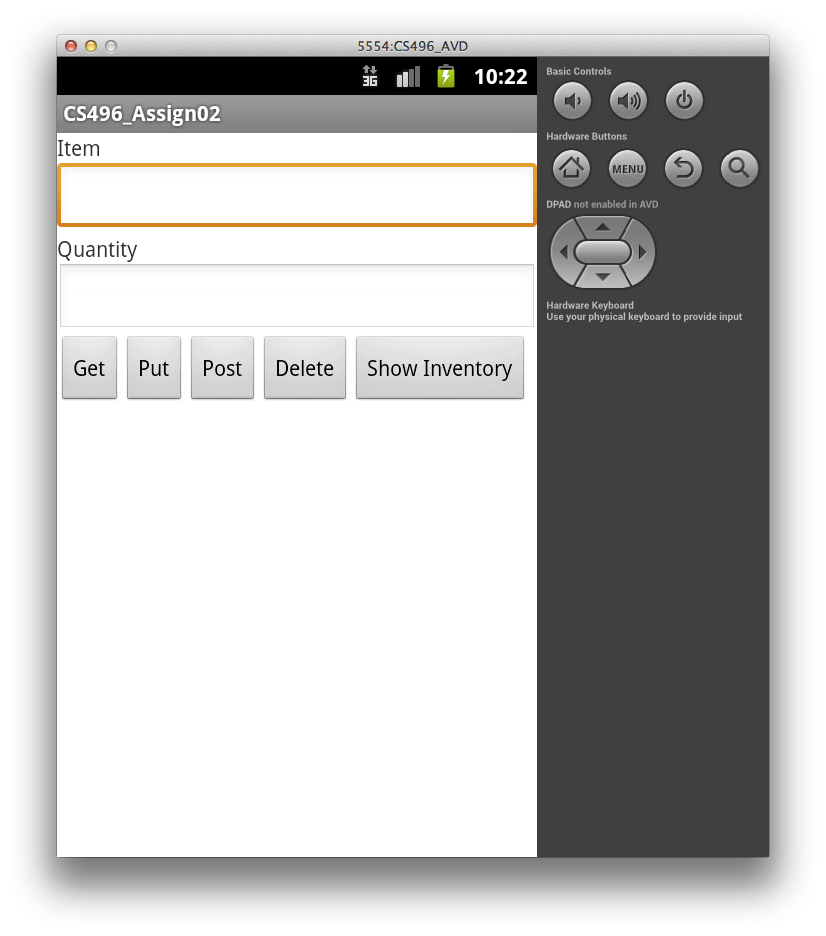
An example mobile client UI might create:
- two EditText components allowing the user to enter an item name and quantity
- four Button components allowing the user to send either a GET, PUT, POST, or DELETE request using the information from the EditText boxes
- one Button component to show the entire current inventory stored on the server
You may choose to enhance the UI if you wish.
The requirements for the mobile client are that it should retrieve the information from the EditText boxes (i.e. the item name and quantity) and produce the appropriate request based on the button clicked as follows:
- Get - if no item name is entered in the EditText box, the app should display the entire inventory (not as JSON) using the same dynamic layout as Show Inventory described below. If an item name is entered in the EditText box, the app should display just that item (if it exists in the inventory) along with its current quantity using the same dynamic layout as Show Inventory described below but with only a single item. Both cases should create an appropriate GET URI to retrieve the requested information. Note: GET requests do not have a JSON payload.
- Put - should require that an item name and quantity are in the EditText boxes, create a valid JSON object for this item (see the Hints below), and send a PUT request with the JSON object as the payload which should update the specified item. Since multiple items cannot be entered with the mobile app, the app should not be able to replace the entire inventory. Instead, PUT should create an appropriate PUT URI that appends both the item's name to the path as well as includes the JSON object in the body.

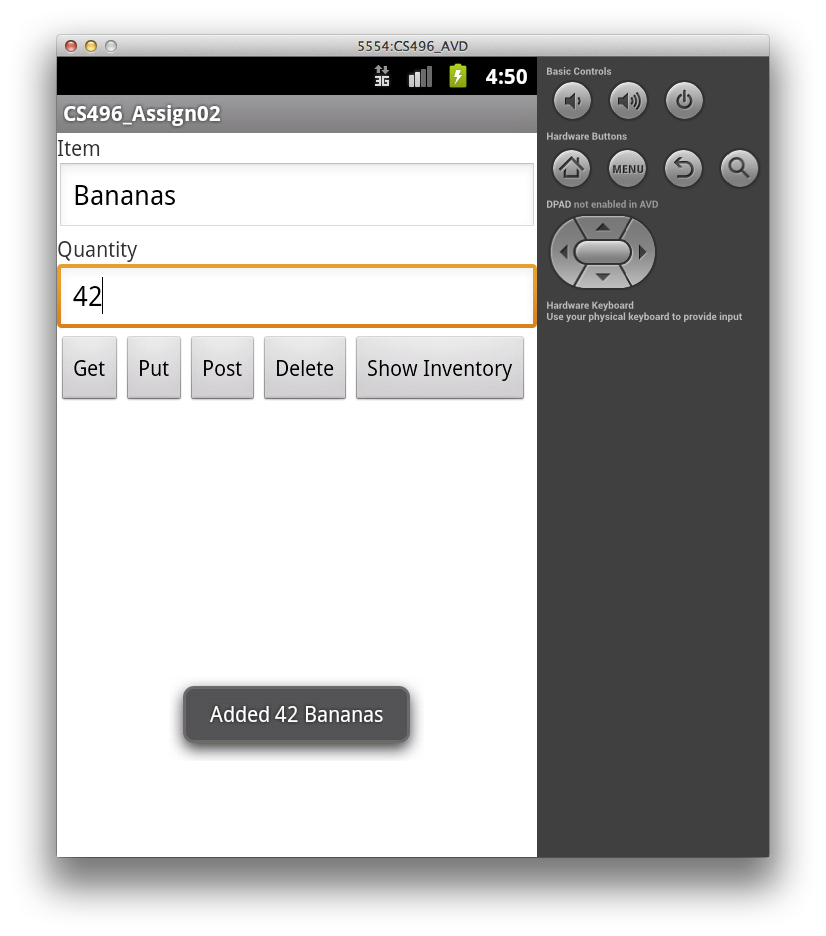
- Post - should require that an item name and quantity are in the EditText boxes, create a valid JSON object for the item, and send a POST request with the JSON as the payload to add the new item.
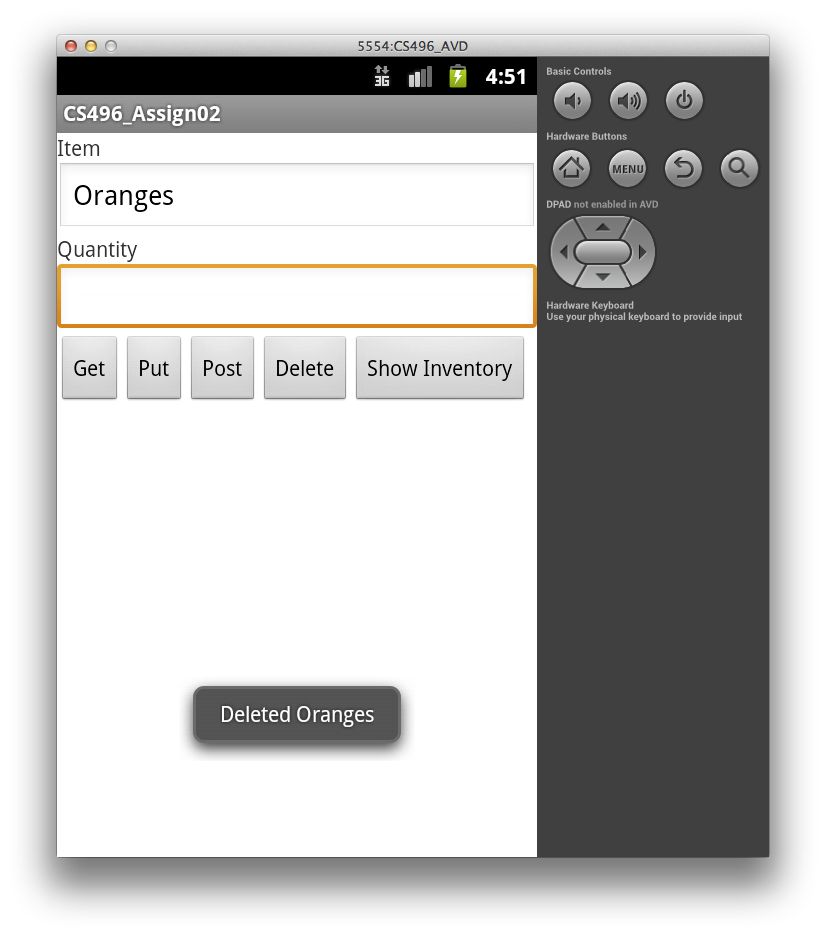
- Delete - if no item name is entered in the EditText box, the app should delete the entire inventory. If an item name is entered in the EditText box, just that item should be deleted (if it exists in the inventory). Both cases should create an appropriate DELETE URI to remove the specified item. Note: DELETE requests do not have a JSON payload but may append the item's name to the path.
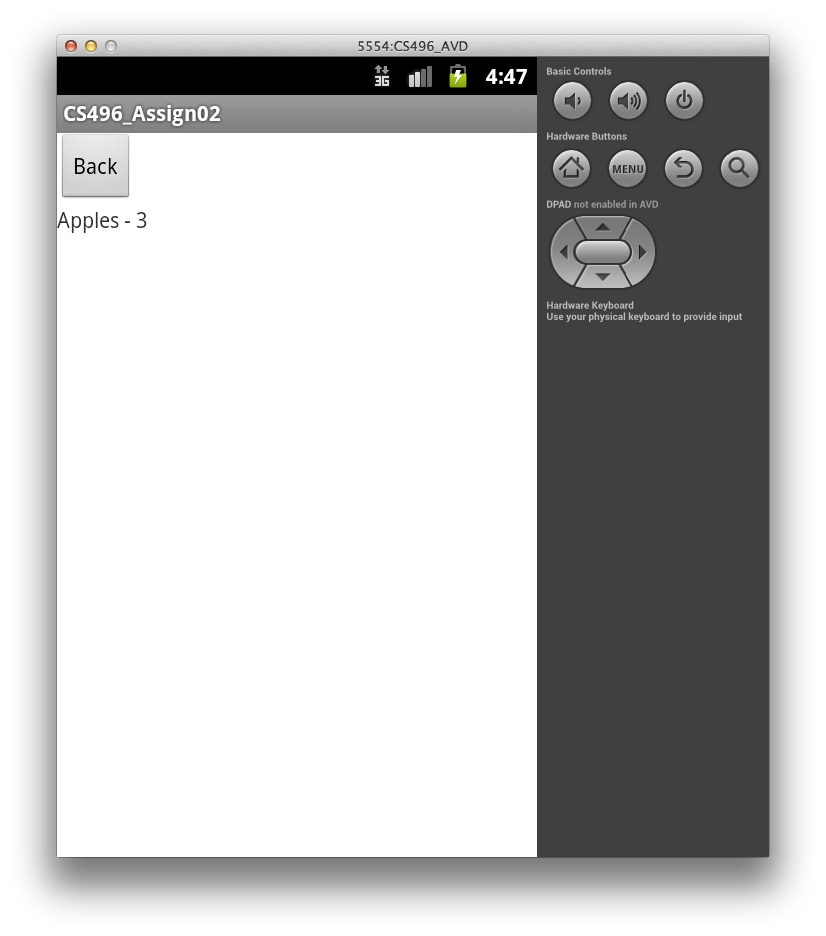
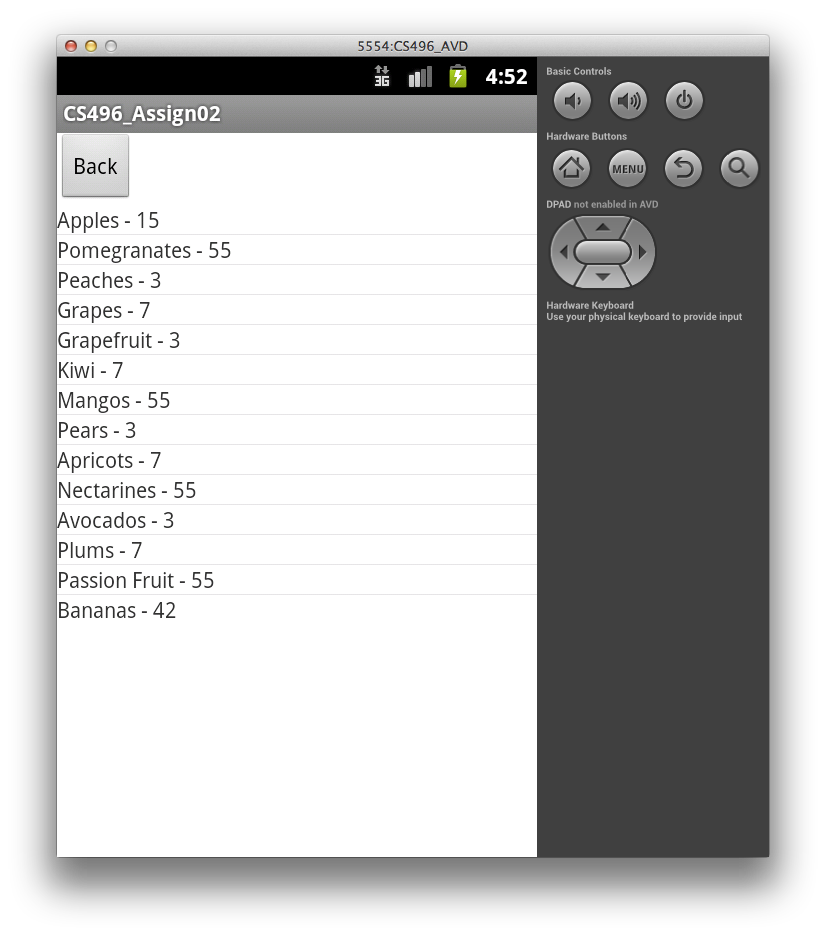
- Show Inventory - should display the entire current inventory retrieved from the server in a new dynamic layout that contains a Back button to return the user to the original data entry view and a ListView for the items (which automatically will provide scroll capabilities for large inventories).
Since PUT, POST, and DELETE do not inherently generate output, display a Toast message informing the user as to what action has been performed (and if it was successfully completed)
Hints
In order to test your mobile client, you can run the provided web service implementation by running the Main class in the CS496_Assign02_WebService project as a Java application.
For the URI's, you can access the web service running on localhost through the Android emulator via the IP address 10.0.2.2 and port 8081.
Use separate controller objects for each of the REST requests (similar to server side) that are called from the corresponding button click callbacks. In each class, have a method which instantiates an appropriate HttpGet, HttpPut, HttpPost, or HttpDelete object.
Create two methods for setting the layout - one that loads the initial layout from activity_main.xml and the other which creates a dynamic LinearLayout view. Call each of these methods as needed from button click methods. Have the dynamic layout method take an Item[] parameter (allowing it to be reused for displaying either the entire inventory retrieved from the server or a partial inventory consisting of just a single item).
A JSON object can be created to add to the payload of a request as follows:
// Create JSON object from Item
Item newItem = new Item();
newItem.setName(itemName);
newItem.setQuantity(quantity);
StringWriter sw = new StringWriter();
JSON.getObjectMapper().writeValue(sw, newItem);

// Add JSON object to request
StringEntity reqEntity = new StringEntity(sw.toString());
reqEntity.setContentType("application/json");
request.setEntity(reqEntity);
To populate a ListView from an array of strings (named listArray) and add it to a dynamic layout
ListAdapter la = new ArrayAdapter<String>(this, R.layout.list_item, listArray);
ListView lv = new ListView(this);
lv.setAdapter(la);
layout.addView(lv);
Grading
Your grade will be assigned as follows:
- Original input layout: 10%
- Dynamic output layout: 10%
- Get - 30%
- Put - 20%
- Post - 20%
- Delete - 10%
Extra Credit: When the entire inventory is displayed, allow the user to select a row from the list which then returns to the data entry view with the item's name and quantity in the EditText boxes.
Submitting
Select the CS496_Assign02 project, then click the blue up arrow icon, and enter your Marmoset username and password when prompted.
Alternatively, export the CS496_Assign02 project to a zipfile, and upload the zipfile to Marmoset as assign02:
