This page will provide detailed instructions for properly importing the course Gradle projects into Eclipse and submitting them to the Marmoset server using the SimpleMarmosetUploader Eclipse plugin.
Importing Gradle Projects into Eclipse
Download the desired project zip file from the course webpage Extract the zip file into a directory with the same name as the zip file such that it contains the src subdirectory and a few configuration files. For example, for the project CS201_Lab02_Gradle.zip should look similar to
Then import it into Eclipse by selecting
File→Import…→Gradle→Existing Gradle Project
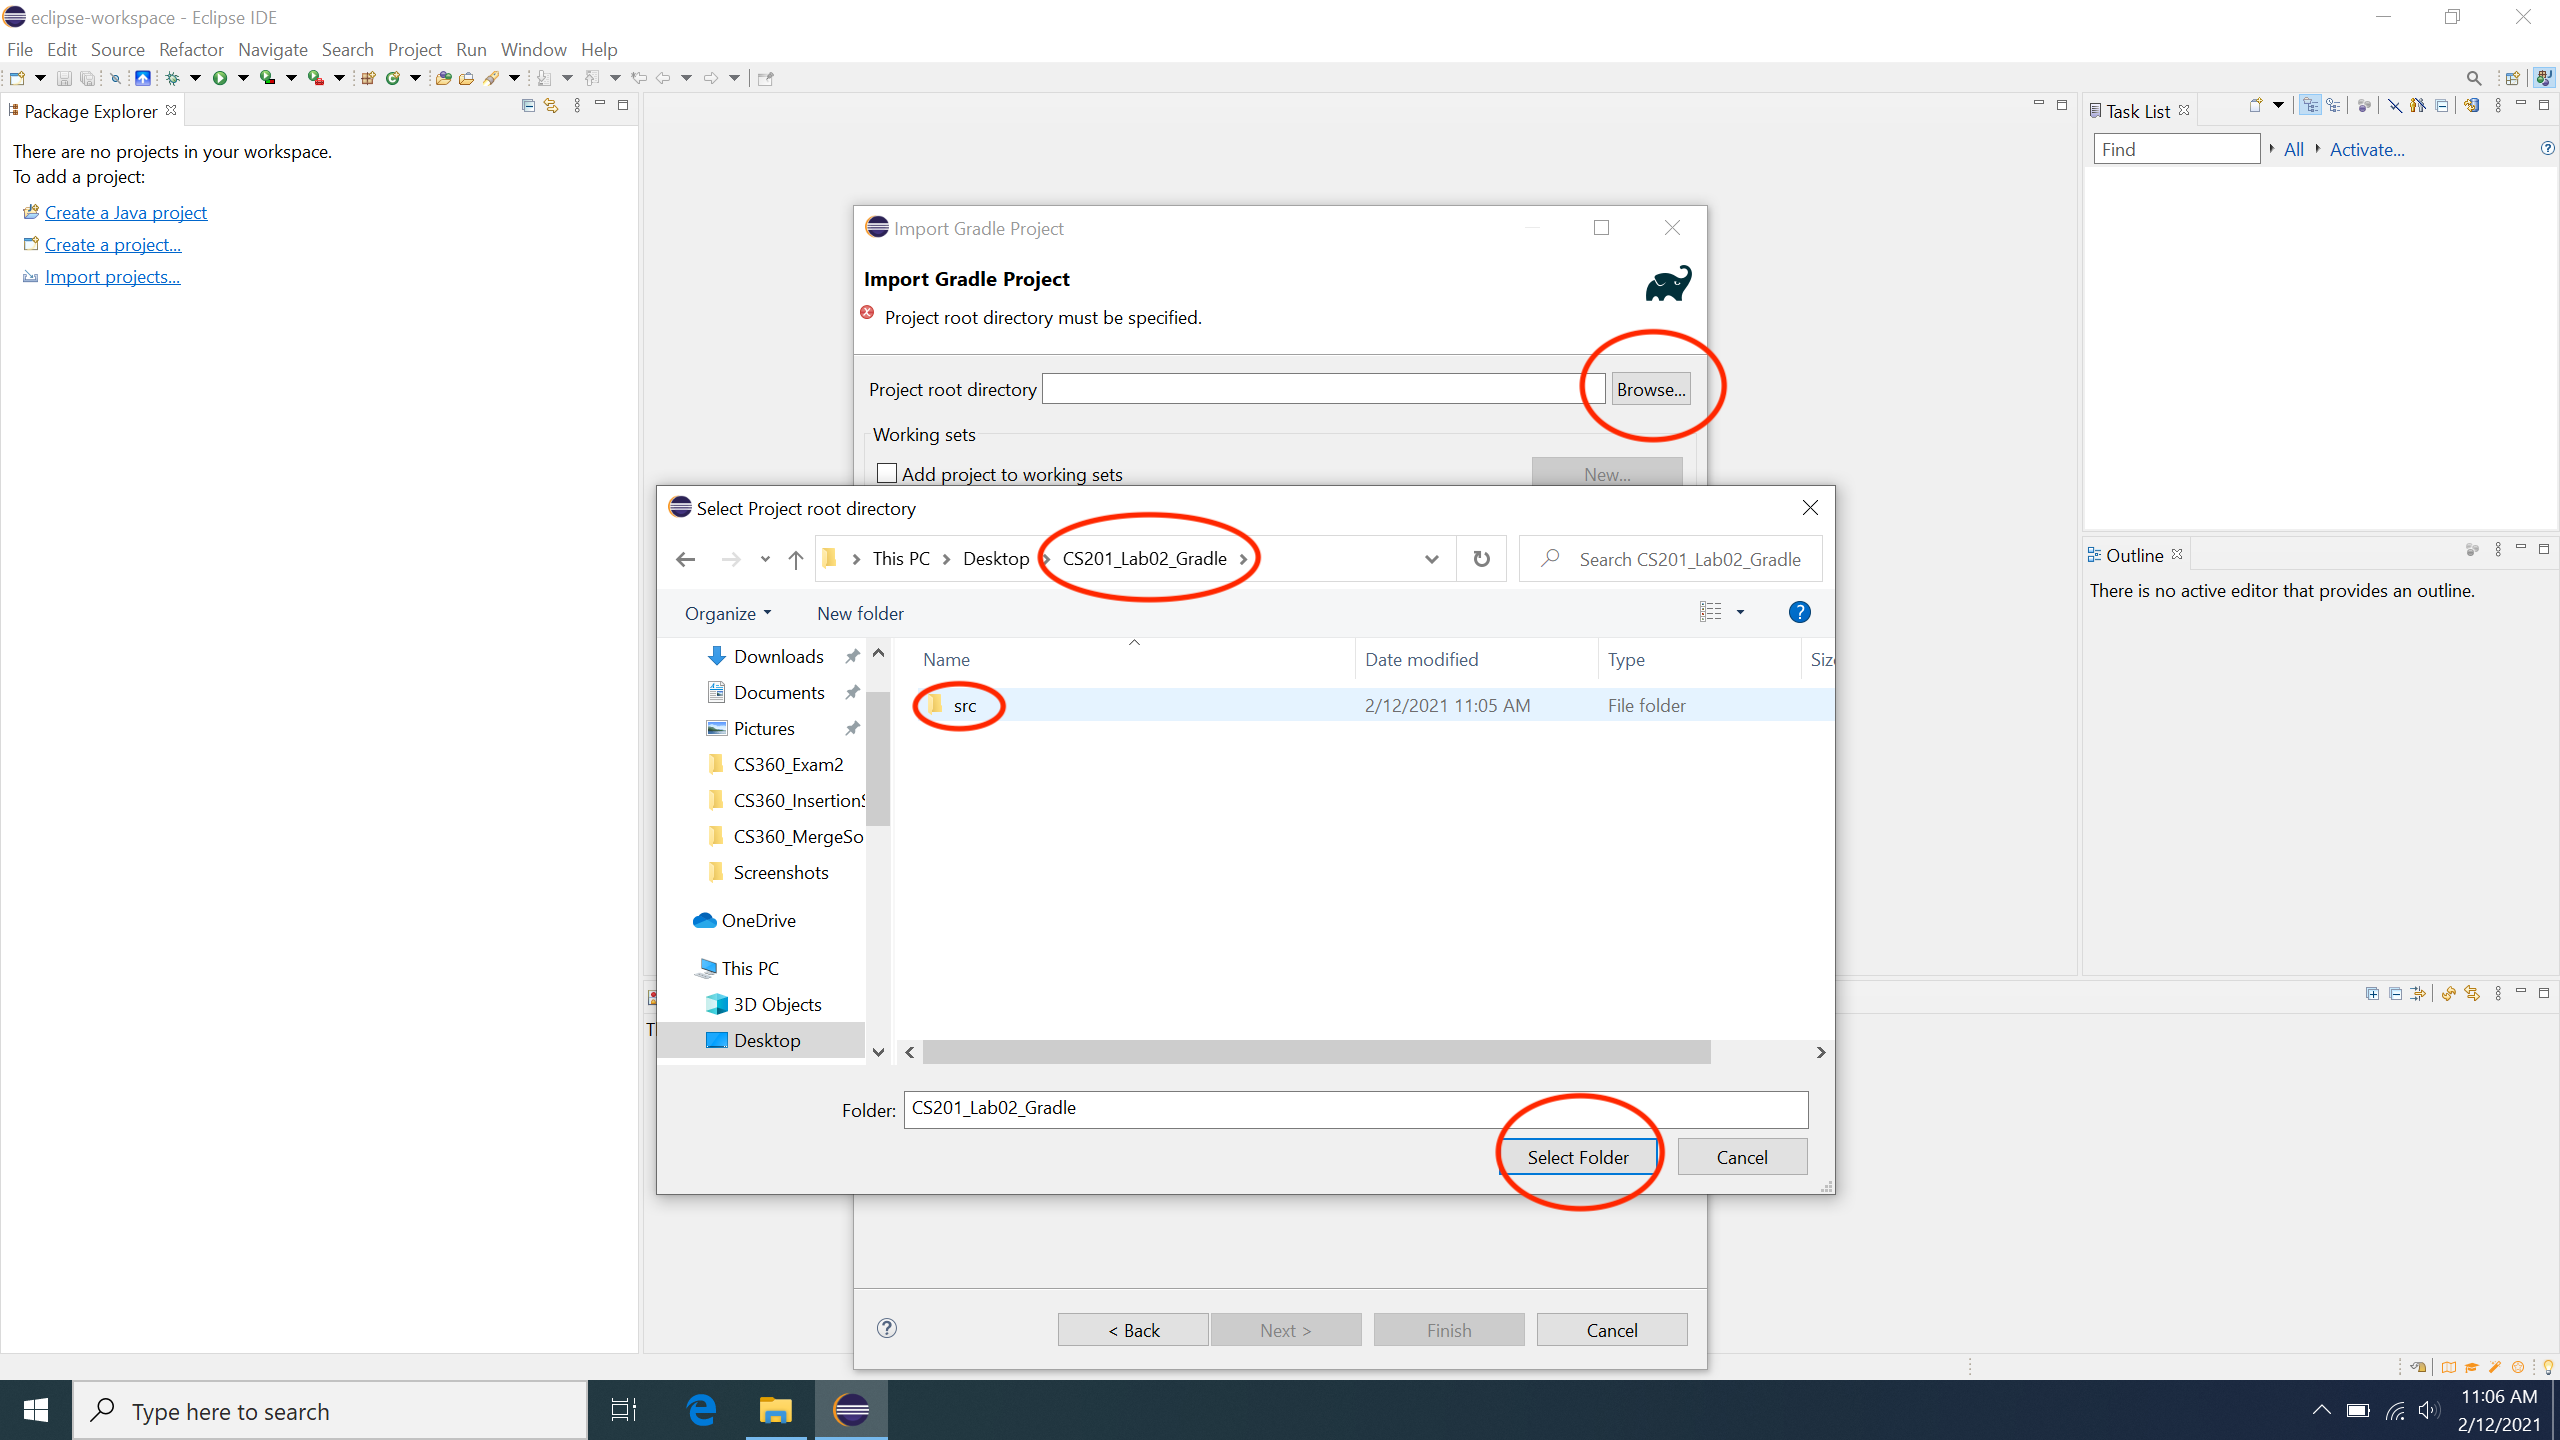
Select Browse in the Import Gradle Project window and navigate to the extracted folder from above such that you see the src directory. Then choose Select Folder as shown below
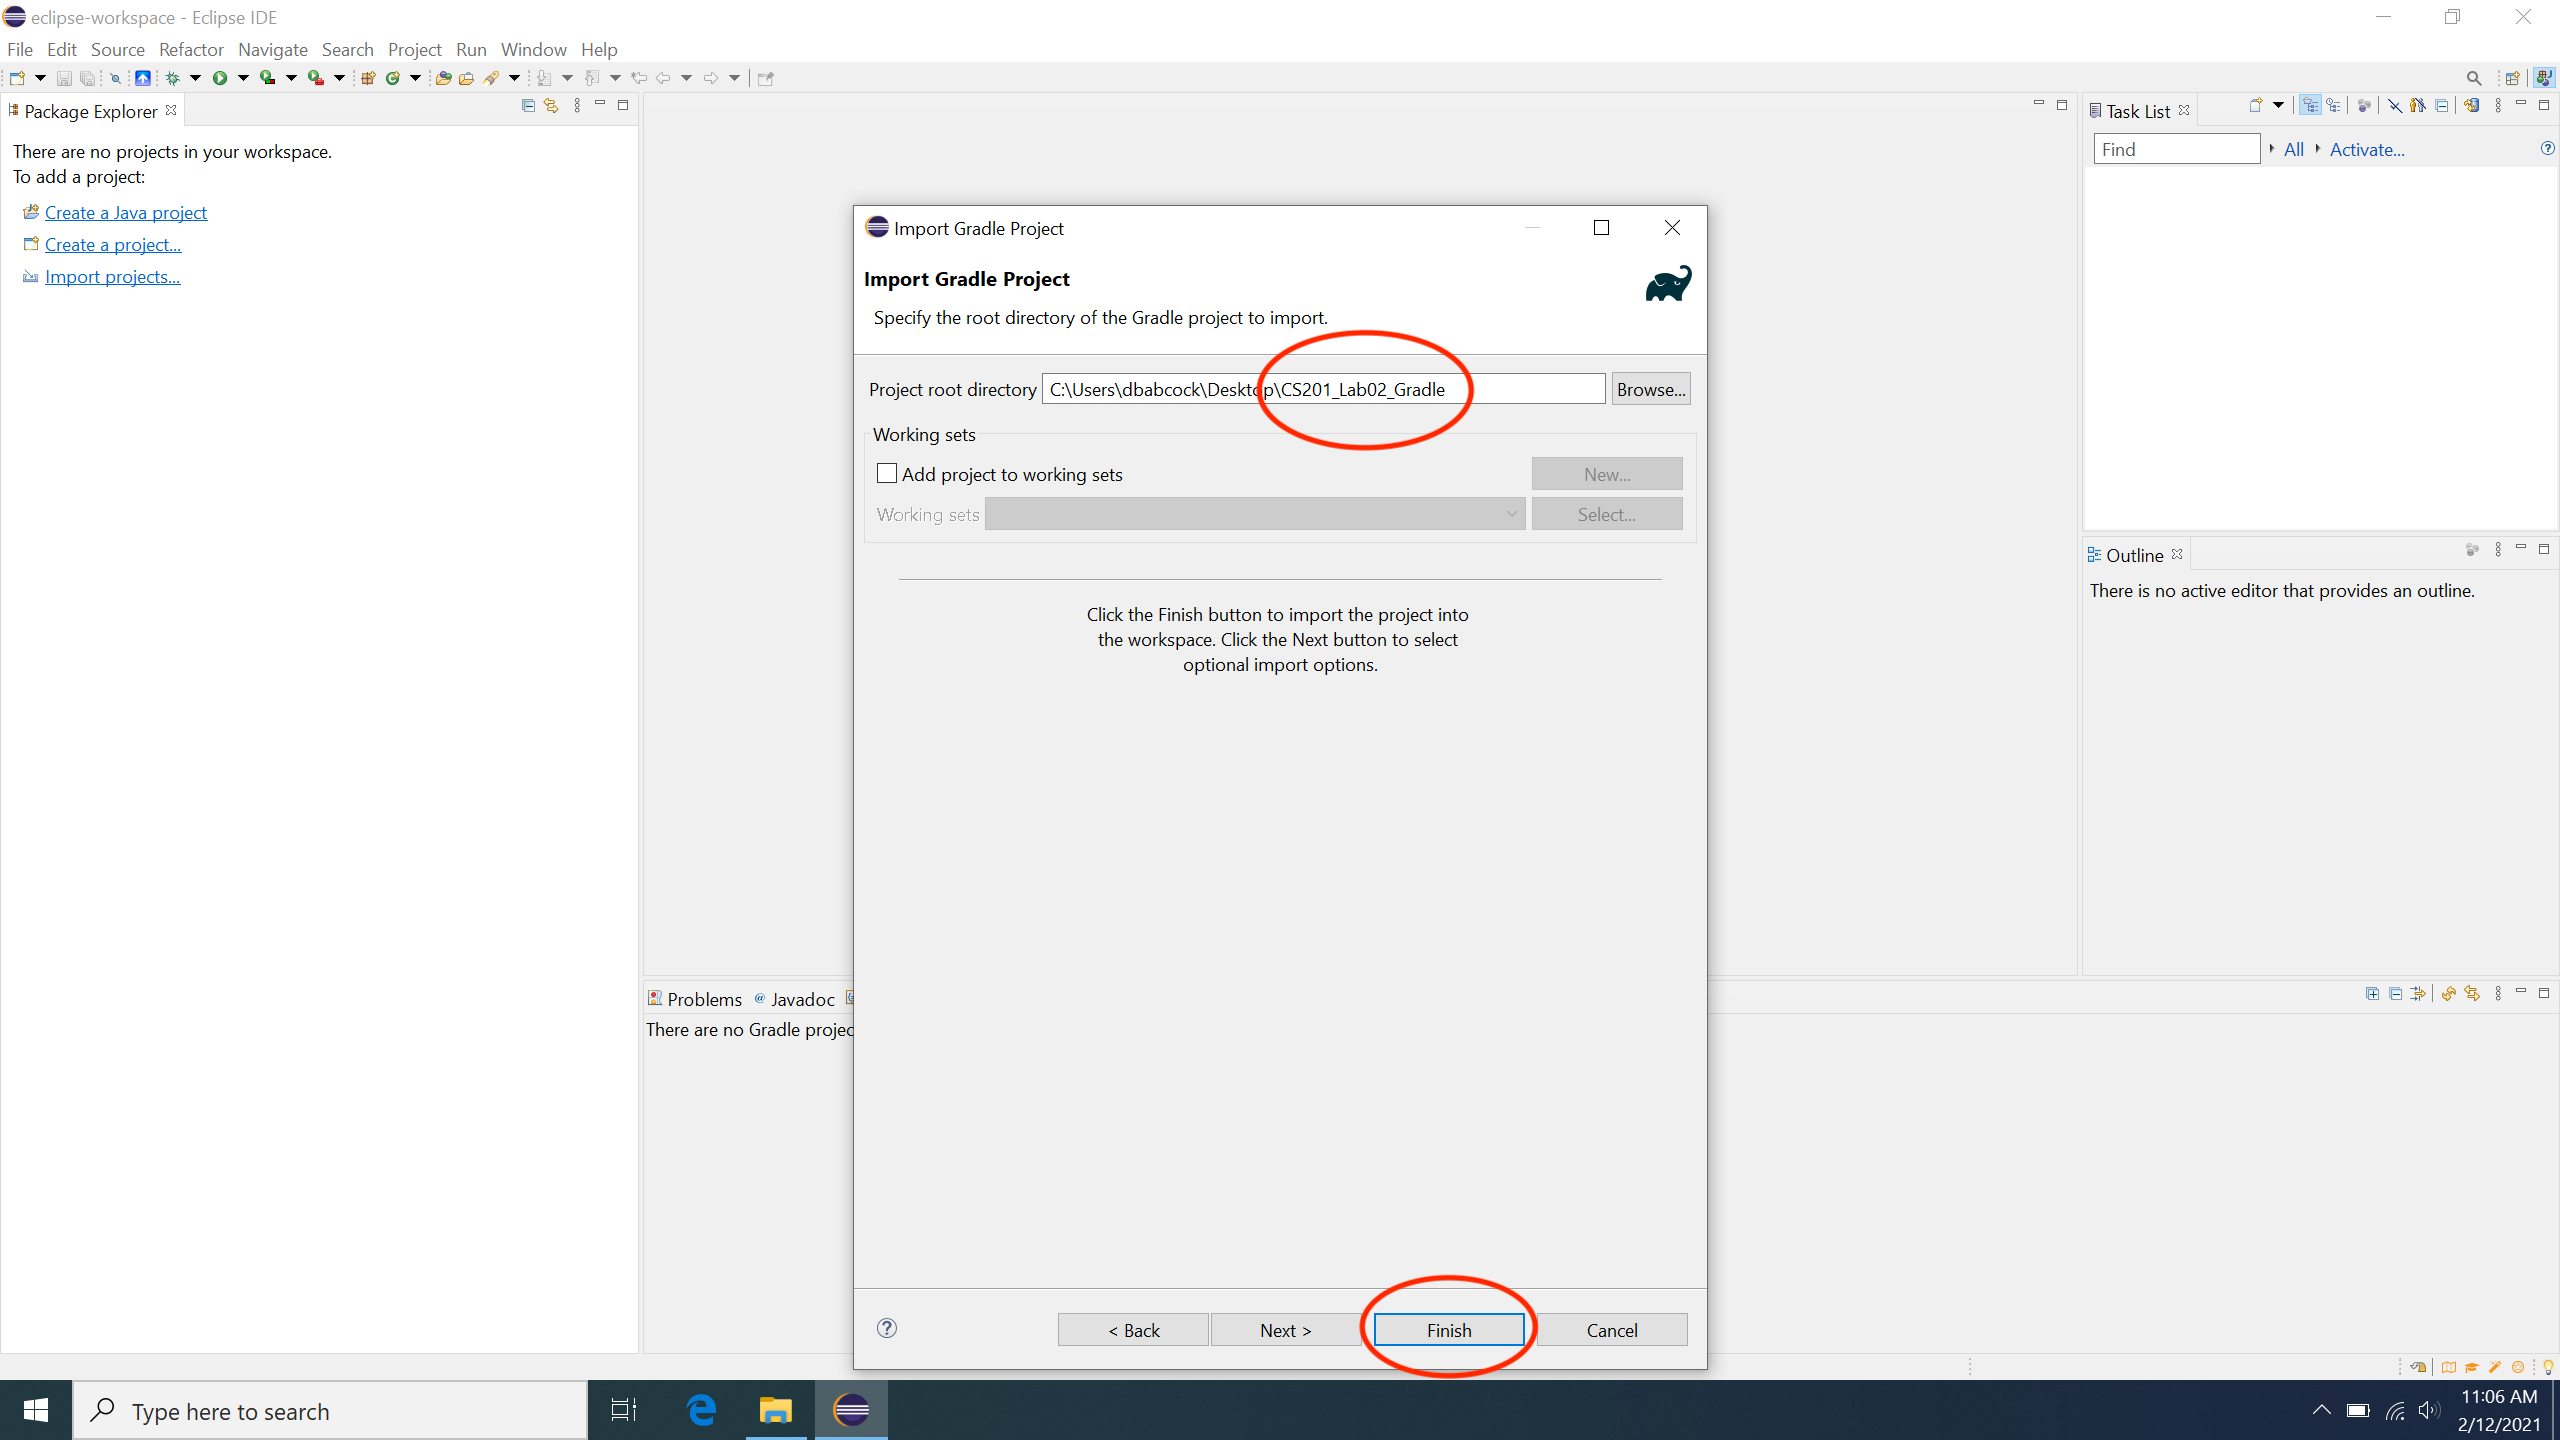
Once the proper directory has been selected, choose Finish to import the project as shown
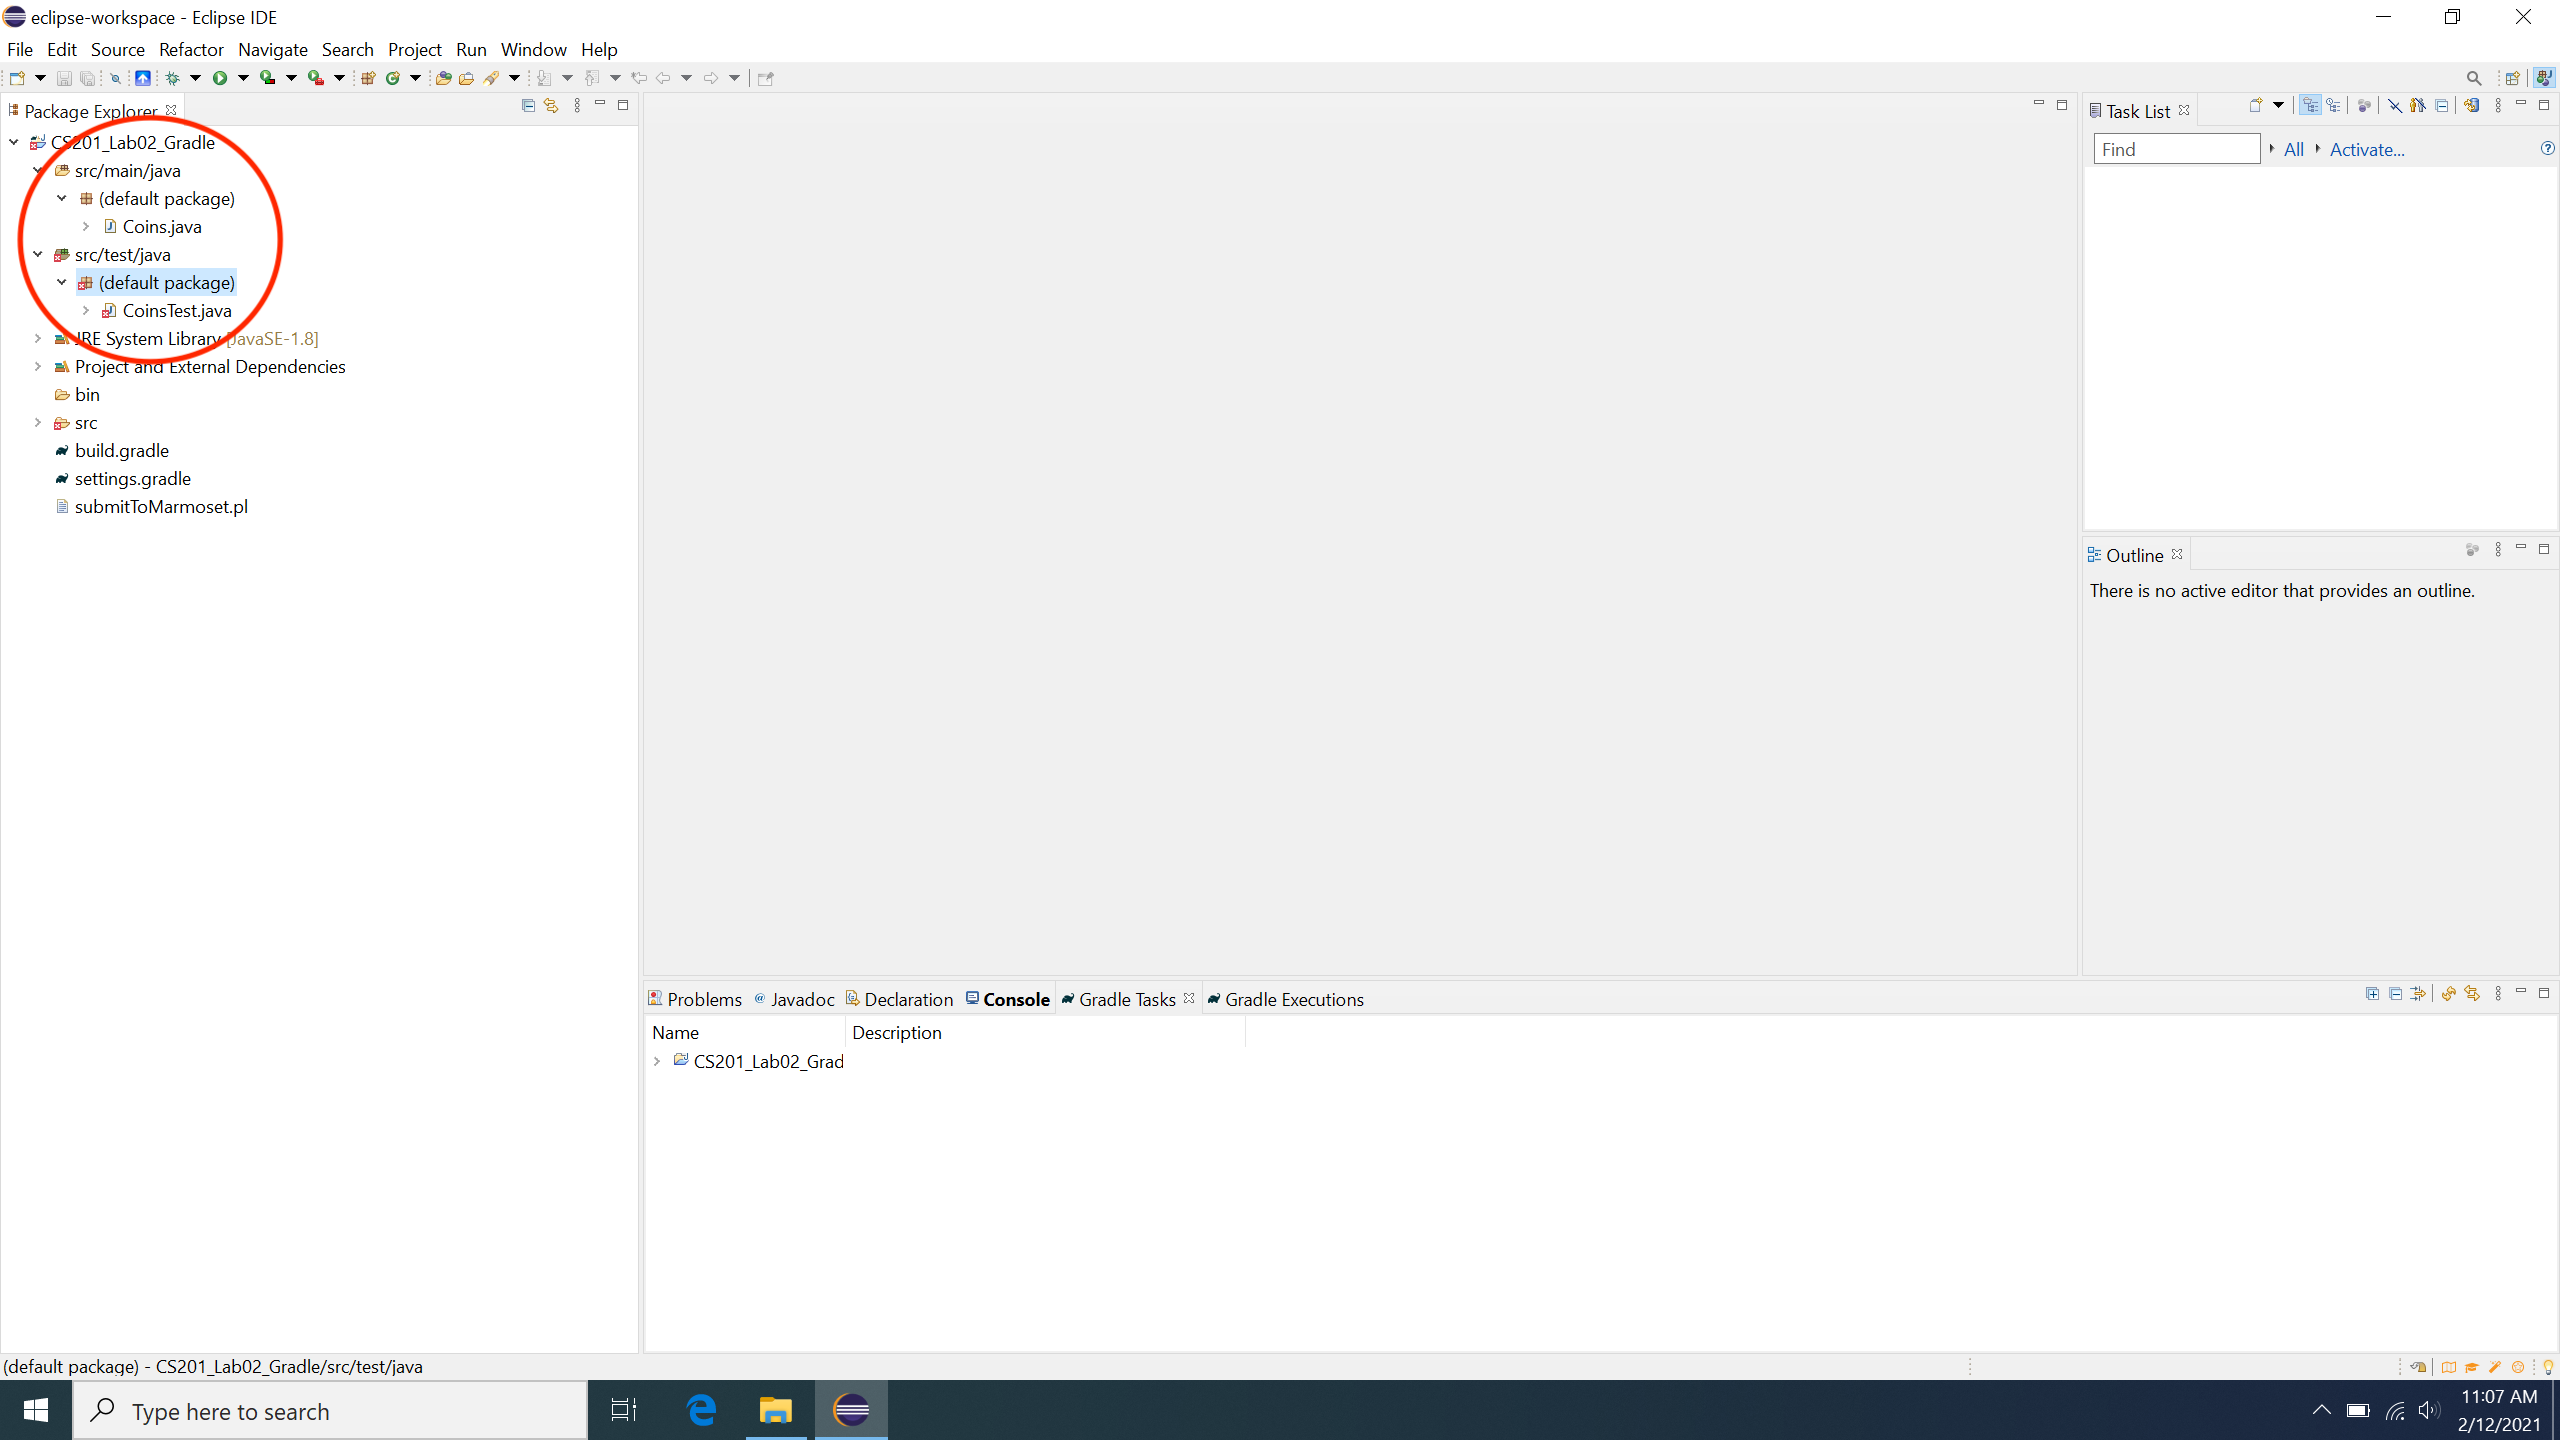
If the import was successful, you should see a project in the Package Explorer pane (e.g. CS201_Lab02_Gradle). If you do not see the Package Explorer pane, select Window→Show View→Package Explorer to open the pane. Expanding the project tab should contain a src/main/java for the source files and src/main/test tab for the test files as shown
If you do not see this structure, try selecting the top level tab (e.g. CS201_Lab02_Gradle), then right-click and select Delete. Then reimport the project.
Submitting to Marmoset via the SimpleMarmosetUploader
Once you have the SimpleMarmosetUploader Eclipse plugin installed,
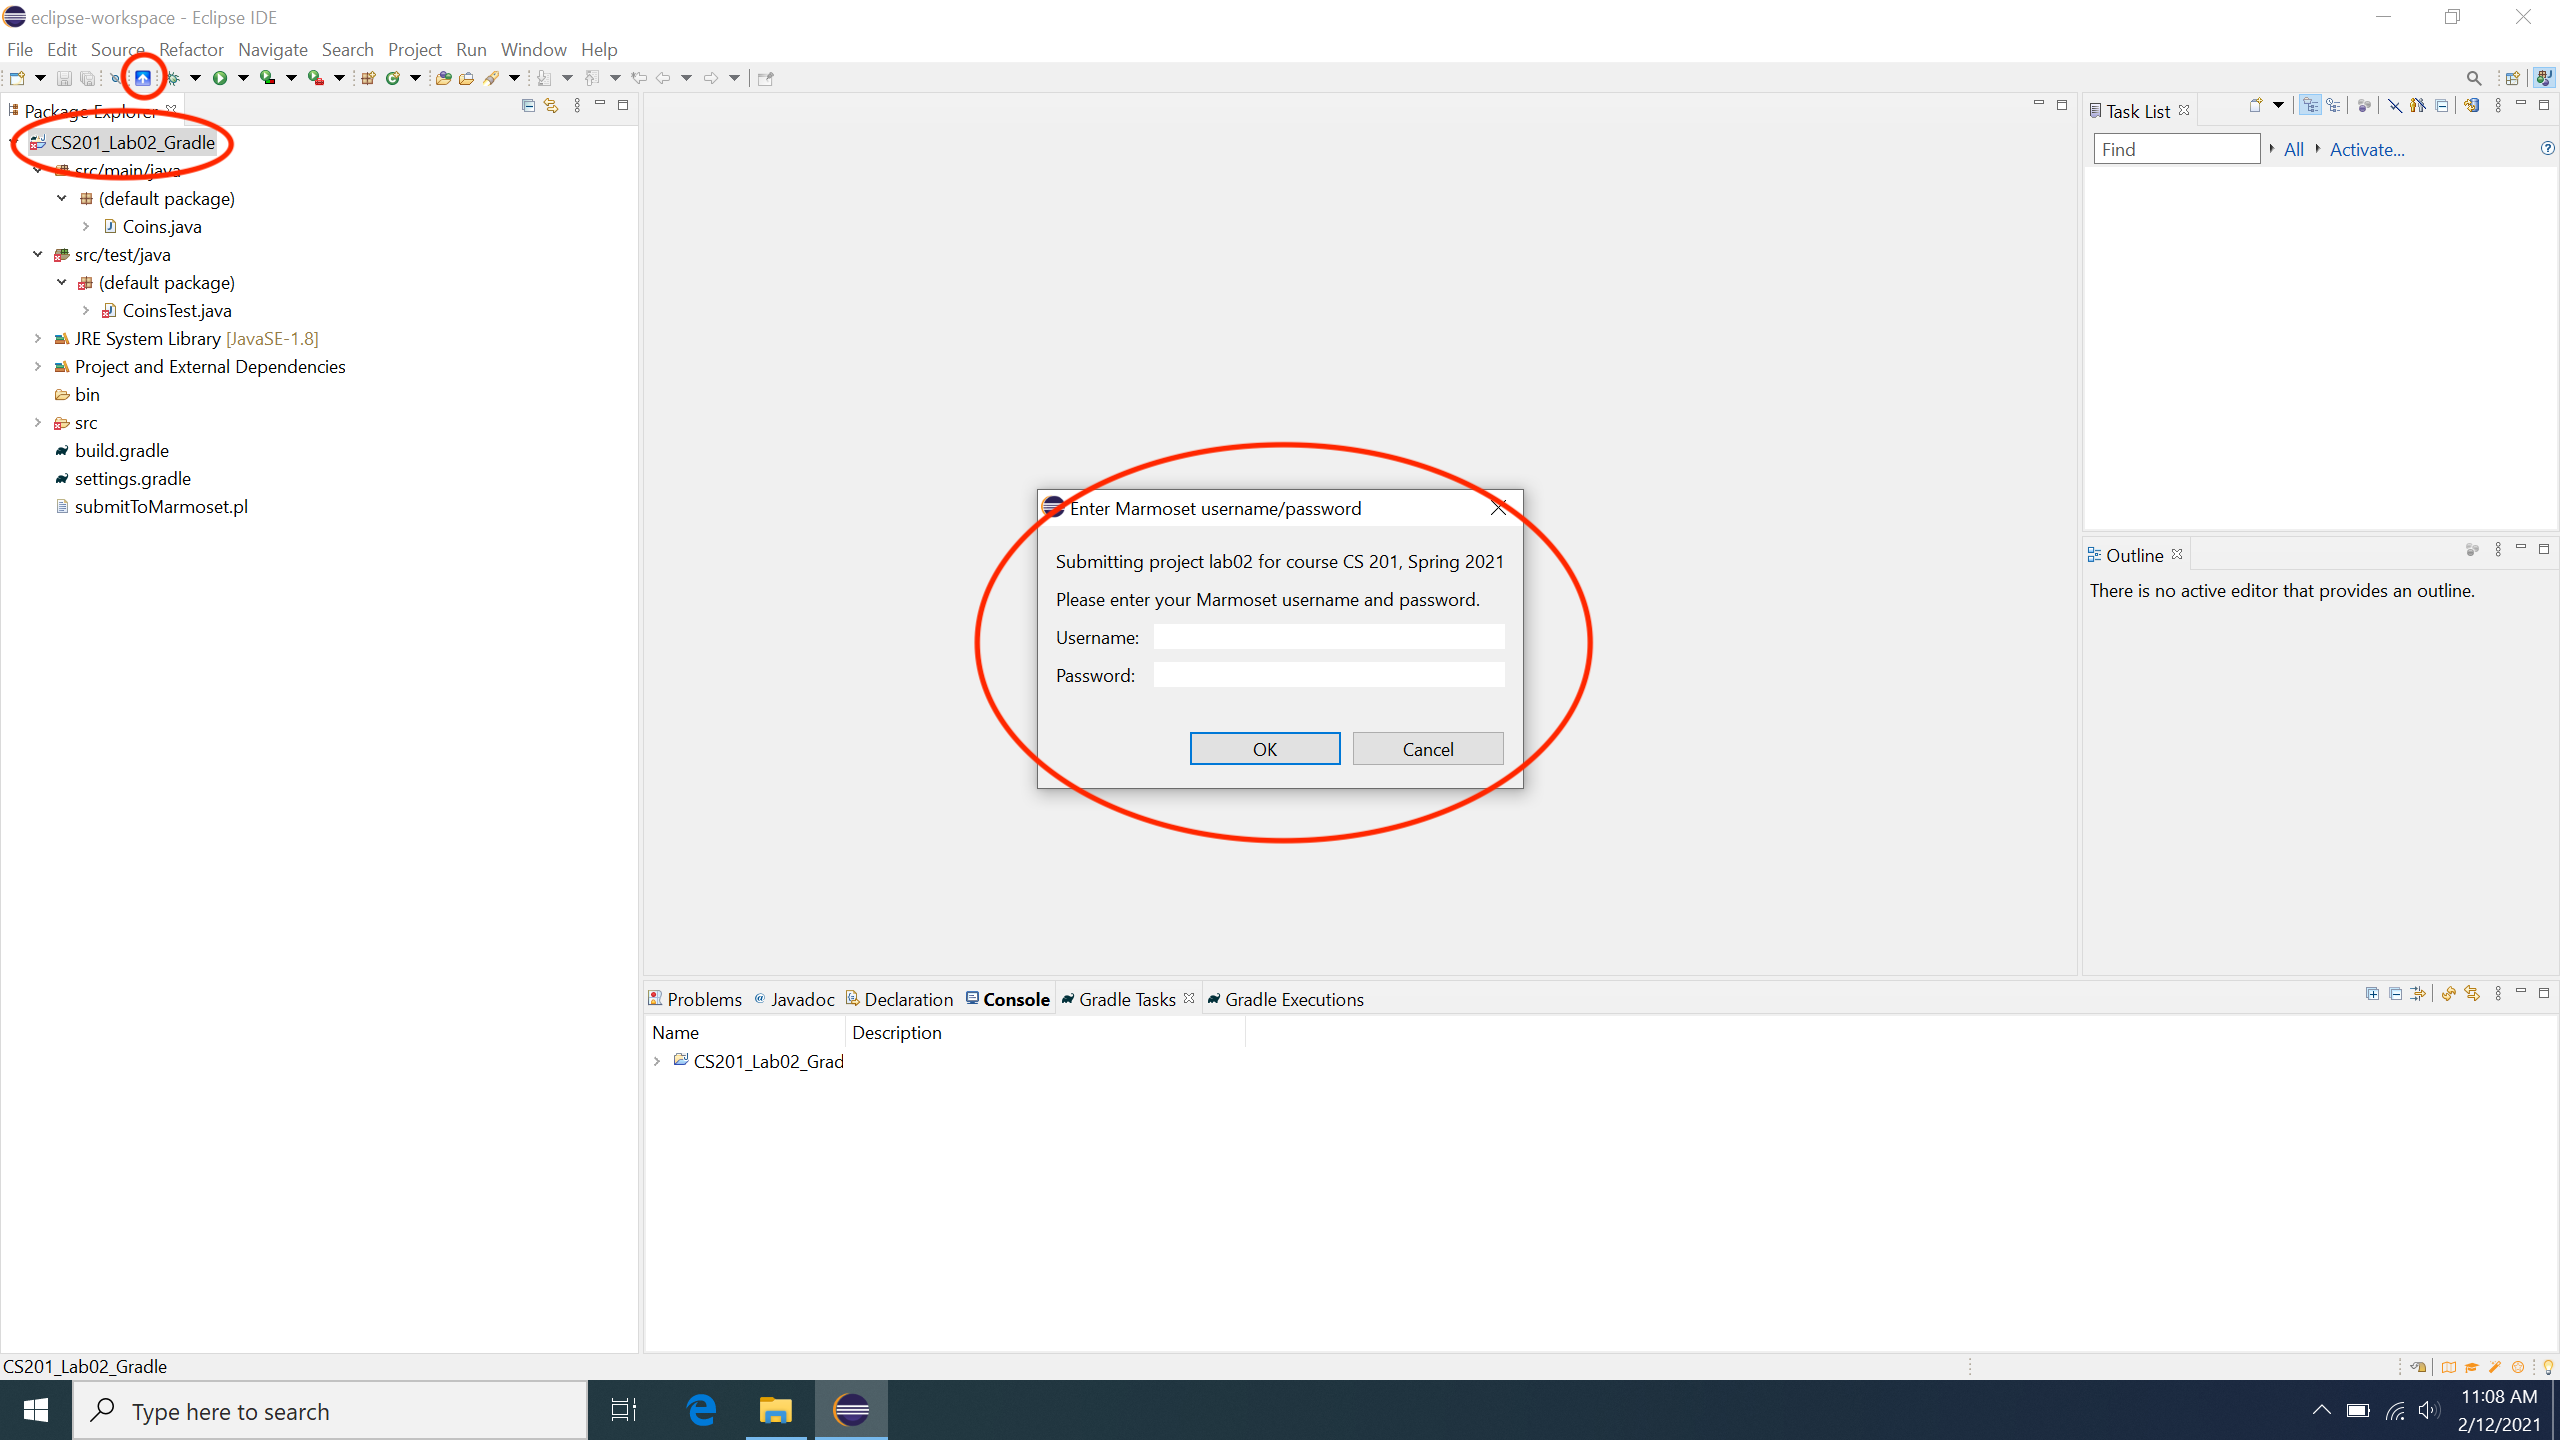
Then to submit a project, simply select the top level tab (e.g. CS201_Lab02_Gradle) then click the blue plugin icon in the button bar. This should open a dialog box for you to enter your credentials as shown
After entering your credentials, you should see a message that the project was successfully submitted.


