Learning goals
- Understand the basic elements of a Processing sketch
- Understand how to run sketches in the Processing environment
- Use Processing drawing functions to draw shapes
What to do
Part 1: Setting up Processing
Start Processing by clicking the start menu, then choosing Programs, then Processing.
Part 2: Importing the example sketch
Download the following zip file and save it in your Downloads folder: Drawing.zip.
Start a file browser window and navigate to your Downloads folder. Right click on Drawing.zip. Choose Extract All, then choose H:\My Documents\Processing as the destination directory.
In Processing, choose File → Open. In the file chooser dialog, navigate to H:\My Documents\Processing, then double click on Drawing, then choose Drawing.pde. You should now have a Processing window with the source code of the example sketch.
Click the run button, which looks like this:

Part 3: Drawing with Processing
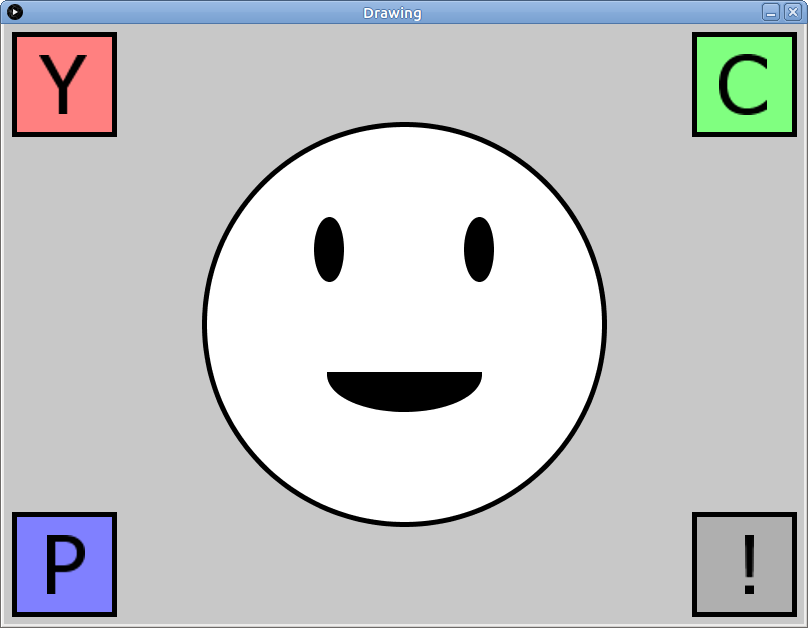
When the sketch runs, it draws a smiley face and some boxes (click for full size):
Read through the code for the sketch. There are comments (lines of text beginning with “//”) describing what each section of code is doing.
Now let’s try changing some stuff!
Find the code (in the draw function) that reads
// Use white fill
fill(255);
Try changing it to
// ???
fill(127);
Run the sketch again. What happened?
Now change it to
// ???
fill(194,200,93);
How did that change things? Experiment with different numeric values. Each value should be an integer between 0 and 255. Suggestion: try setting two of the values to 0 and one of the values to 255. What happens when the first value is 255? The second? The third?
Now find the code (again, in the draw function) that reads
// Large circle centered at 400,300
ellipse(400,300,400,400);
Try changing it to
// ???
ellipse(400, 300, 500, 500);
Run the sketch again. What happened? Now try
// ???
ellipse(400, 300, 300, 300);
How did that change things? Next, try
// ???
ellipse(200, 300, 400, 400);
What happened? Finally, try
// ???
ellipse(600, 300, 400, 400);
Try some other values for the ellipse command to change the placement and/or size of the ellipse.
Next: find the code reading
// Black-filled arc (part of an ellipse)
arc(400,350,150,70,0,PI,CHORD);
Change it to
// ???
arc(400, 350, 150, 70, PI, PI+PI);
What happens?
Finally, find the code
// Use thick black borders on shapes
stroke(0);
strokeWeight(5);
Change it to
// ???
stroke(85, 15, 157);
strokeWeight(10);
What did that do?
Part 4: Making your own drawing
At this point, you probably have a pretty good idea of what’s going on in a basic Processing sketch:
setupis for code that runs when the sketch starts, and it can set the size of the window, set a background color, and other do other “just once” operationsdrawis for code that does drawing operations- the origin point (0, 0) is the upper left corner of the window
- x coordinates increase going to the right
- y coordinates increase going down
- fill and stroke colors can be black (0), white (255), gray (somewhere between 0 and 255), or arbitrary colors (red, green, and blue component values, each within the range 0-255)
You can consult the Processing reference for a complete list of all Processing functions, including the drawing functions.
To finish up, please start your own Processing sketch by following the instructions in the Getting started section of Assignment 2. This should create a sketch called VisualArtProject.
In the time remaining, start to translate the sketch you made on the graph paper into drawing operations in your new Processing sketch. You probably won’t be able to create the entire image, but if you do at least a few shapes, that’s great.
