In the last lab we saw how to use programmable shaders written in GLSL. Hence if we are able to get shader source code, we could implement them within our standard OpenGL code using the load_shaders() routine from that lab. The true power of modern graphics hardware, however, is unlocked by being able to write our own programmable shaders to produce any effect we desired. There are many different shader languages including GLSL, HLSL, cG, etc. We will be focusing on GLSL which is the shader language for OpenGL. Even though the command set for shaders is very limited compared to C, the structure of a shader program is very similar, e.g. semi-colon terminated statements. However, writing shaders can be substantially more difficult to do primarily because the programs are very particular about syntax and because there is not a good debugging mechanism available to help correct non-functional shader programs (since they are only executed once they have been compiled and loaded onto the graphics card). A few debugging tools are available, such as glslDevil and OpenGL Shader Builder (for Apple Developers) but it is still a challenging task to write sophisticated shaders. The primary drawback to using programmable shaders is that if you use them, you must program every feature you want implemented, e.g. lighting, blending, etc. Hence it is essential to understand all the concepts we have discussed, i.e. the mathematical implementation, in order to program it in your shaders.
0. Getting Started
Download CS370_Lab11.zip, saving it into the labs directory.
Double-click on CS370_Lab11.zip and extract the contents of the archive into a subdirectory called CS370_Lab11
Navigate into the CS370_Lab11 directory and double-click on CS370_Lab11.sln (the file with the little Visual Studio icon with the 12 on it).
If the source file is not already open in the main window, open the source files by expanding the Source Files item in the Solution Explorer window and double-clicking simpleGLSL.cpp, simplevert.vs, and simplefrag.fs.
1. Built-in Shader Data Types
When we write shaders we can use many of the data types we are familiar with in C/Java such as bool, int, float (but no double) along with identical single dimensional array and structure notation. However since the pipeline primarily performs matrix/vector operations, there are several built-in data types for vectors and matrices. Vector types have the form
[i,b]vec{2,3,4}
where [i,b] is an optional indicator of integer / boolean data type (the default is float) and {2,3,4} represents the number of components in the vector. For example
vec4 col;
would define a variable named col that is a 4x1 float vector. Matrix types (which are always square) have a similar form
mat{2,3,4}
where {2,3,4} represents the number of rows and columns in the matrix. NOTE: Matrices can only be float's and are stored column-wise (like user defined transformation matrices).
Since the variables within the shaders often refer to common graphics quantities, e.g. vertices, colors, etc., in addition to standard integer indices we can refer to the elements of a vec? variable using the structure fields - {x,y,z,w} (vertex coordinates), {r,g,b,a} (color channels), or {s,t,p,q} (texture coordinates). For example, col[2], col.z, col.b, and col.p all refer to the same value (regardless of what the vector quantity actually represents). We can also use any combination of these fields, known as swizzling, to refer to parts of a vector that we wish to manipulate, i.e. col.rb would refer to only the red (first) and blue (third) components. Furthermore, since the graphics pipeline supports vector operations (on variables with compatible dimensions), the standard arithmetic operators can also be used on vector/matrix quantities as a whole (rather than having to perform operations element by element).
Tasks
- Add code to simplevert.vs in main() to define four float variables (note use four separate statements) called red, green, blue, and scale.
- Add code to simplevert.vs in main() to define a vec3 variable called my_scale.
- Add code to simplevert.vs in main() to define a vec4 variable called my_color.
2. Shader Variable Qualifiers
Since we cannot pass arguments to the shaders, there are several qualifiers for global shader variables (i.e. ones declared outside main() in the shader source file). The shader global variables are then given values by the application and/or transferred between the vertex and fragment shaders. The four qualifiers are:
- const - indicates that a variable is constant to avoid inadvertently changing it within a shader.
- attribute - indicates that a variable is passed from the application, but that it will change at most once per vertex, i.e. a quantity the application will assign on a per vertex basis. Thus an attribute variable can be modified from vertex to vertex within the same primative.
- uniform - indicates that a variable is passed from the appliction, but that it will not change for an entire primative, i.e. cannot be modified within a glBegin()/glEnd() construct. Thus a uniform variable is fixed from vertex to vertex within the same primative.
- varying - indicates that a variable is passed from a vertex shader to a fragment shader. Thus it will be interpolated across the corresponding fragment based on the current shading model.
Tasks
- Add code to simplevert.vs before main() to define a uniform float variable called time (which we will later associate in the application).
- Add code to simplevert.vs before main() to define a varying vec4 variable called color_out (which will be passed to the fragment shader).
- Add code to simplefrag.fs before main() to define a corresponding varying vec4 variable called color_out (which will be received from the vertex shader).
Add code to simplevert.vs in main() to use the time variable to perform the following scalar computations (NOTE: the shader language supports many common math functions - see the Quick Reference handout):
scale = 1.0 + 0.5*sin(time);
red = 1.0 + 0.5*sin(time);
green = 1.0 + 0.5*cos(time);
blue = 1.0 + 0.5*sin(time)*cos(time);
Add code to simplevert.vs in main() to set every component of my_scale to scale. NOTE: You can set each component individually via array notation, or in a single step by creating a vec3(scale, scale, scale) object.
Add code to simplevert.vs in main() to set the components of my_color to red, green, blue, and 1.0 (since it is an RGBA color). NOTE: You can set each component individually via field notation .r, .g, .b or in one step by creating a vec4(red,green,blue,1.0) object.
3. Shader Variables and Shader Arithmetic
In addition to values passed to the shaders from the application (either attribute or uniform) through variables, GLSL provides many predefined variables that represent OpenGL values set in the application by OpenGL functions (see the Quick Reference handout). Some of the common ones from the application used in the vertex shader are
- gl_Vertex - the vec4 current vertex coordinate values (set via glVertex3f())
- gl_Color - the vec4 current vertex color values (set via glColor3f())
- gl_ProjectionMatrix - the mat4 of the current projection matrix (set via glOrtho() or glFrustum())
- gl_ModelViewMatrix - the mat4 of the current modelview matrix (set via the various transformation functions)
- gl_ModelViewProjectionMatrix - the mat4 of the current product of the projection and modelview matrices (essentially the total coordinate transformation applied per vertex)
Some common variables passed from the vertex shader to the fragment shader are
- gl_Position - the clipped vertex positions output from the vertex shader (based on applying shader transformations)
- gl_FrontColor - the final vertex color output from the vertex shader (based on modifying the shader colors possibly including lighting)
Finally the necessary variable in the fragment shader is
- gl_FragColor - the final fragment color output from the fragment shader and displayed in the framebuffer
Hence to use shaders properly, the vertex shader will use gl_Vertex, gl_Color, and (usually) gl_ModelViewProjectionMatrix to compute gl_Position and gl_FrontColor. Then the fragment shader may use gl_FrontColor to compute (or simply set) gl_FragColor which is the final color for the fragment in the framebuffer. There are many other variables for effects like lighting/materials, normals, texture mapping, and other useful matrices (e.g. inverse matrices, eye coordinate matrices, etc.) We will use many of these other variables to perform bump mapping in a later lab.
Tasks
Add code to simplevert.vs in main() to perform the following computations:
- Compute gl_Position as the product of gl_ModelViewProjectionMatrix and gl_Vertex. Note this duplicates the default pipeline behavior.
- Modify gl_Position by multiplying the x,y,z components (use .xyz) by my_scale.
- Compute color_out by multiplying gl_Color by my_color. Note this value will be passed to the fragment shader.
Add code to simplefrag.fs in main() to set gl_FragColor to color_out. Note this value comes from the vertex shader.
4. Associating Application Values
At this point we have created both a vertex and fragment shader program. From the last lab we also have boiler plate code (load_shaders()) that will load, compile, and link these shaders into a shader program. However now that we have defined a uniform variable in the vertex shader which is passed from the application, we need to associate a variable in our application with the variable in the shader. First we must associate an application parameter which identifies the desired shader variable using
param = glGetUniformLocation(progObj, "var");
where param is a GLint that identifies the shader variable (similar to a pointer), progObj is the shader program object (see lab10), and var is the variable name in the shader source file we wish to associate (note the name is enclosed in double quotes). A similar function - glGetAttribLocation( ) - exists for associating attribute shader variables. Whenever we wish to set the value of the shader variable, we simply call
glUniform[1,2,3]f(param, val);
where param is the identifier from above, [1,2,3] selects the number of values passed, and val is the value (either a literal, application variable, or expression) to be assigned to the associated shader variable. Again there is an equivalent glVertexAttrib?f( ) function to set attribute shader variables (usually per vertex). Just like many other OpenGL functions (e.g. glVertex3?( )), there are different forms of these commands based on the type and number of components for the respective shader variables. Finally we can also pass a uniform matrix with the command
glUniformMatrix{2,3,4}f(param, num, trans, *val);
where param is the identifier, num is the number of values to change, trans is a boolean specifying whether or not to use the transpose, and val is a pointer to an array containing the values to set (recall that all shader matrices are float).
NOTE: One of the above functions must be called every time the shader variable needs to be updated, i.e. simply changing the application variable will have no effect if the attachment function is not subsequently called.
Tasks
- Add code to SimpleGLSL.cpp to create two global variables - a GLuint called timeParam and a GLfloat called app_time.
- Add code to main( ) to associate timeParam with the uniform shader variable time (note this is a scalar, i.e. 1D).
- Add code to render_Scene( ) to set the timeParam associated shader variable to app_time.
Compiling and running the program
Once you have completed typing in the code, you can build and run the program in one of two ways:
- Click the small green arrow in the middle of the top toolbar
- Hit F5 (or Ctrl-F5)
(On Linux/OSX: In a terminal window, navigate to the directory containing the source file and simply type make. To run the program type ./simpleGLSL.exe)
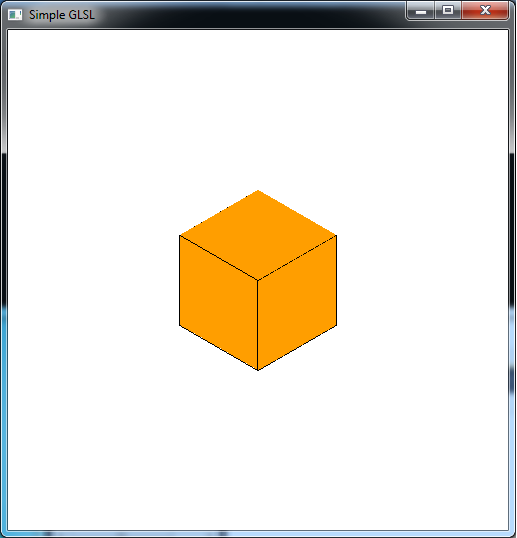
The output should look similar to below
To quit the program simply close the window.
A complete reference for GLSL is OpenGL Shading Language by Randi Rost (a.k.a. the "Orange Book"). The reference handout along with other resources can be found at http://www.opengl.org/documentation/glsl/.
Throughout the rest of the semester, we will be implementing our effects, e.g. lighting, texture mapping, etc., in the shaders rather than using the default pipeline behavior. Initially we will simply duplicate the default pipeline behavior, but you will be able to then modify this behavior to create new effects.
