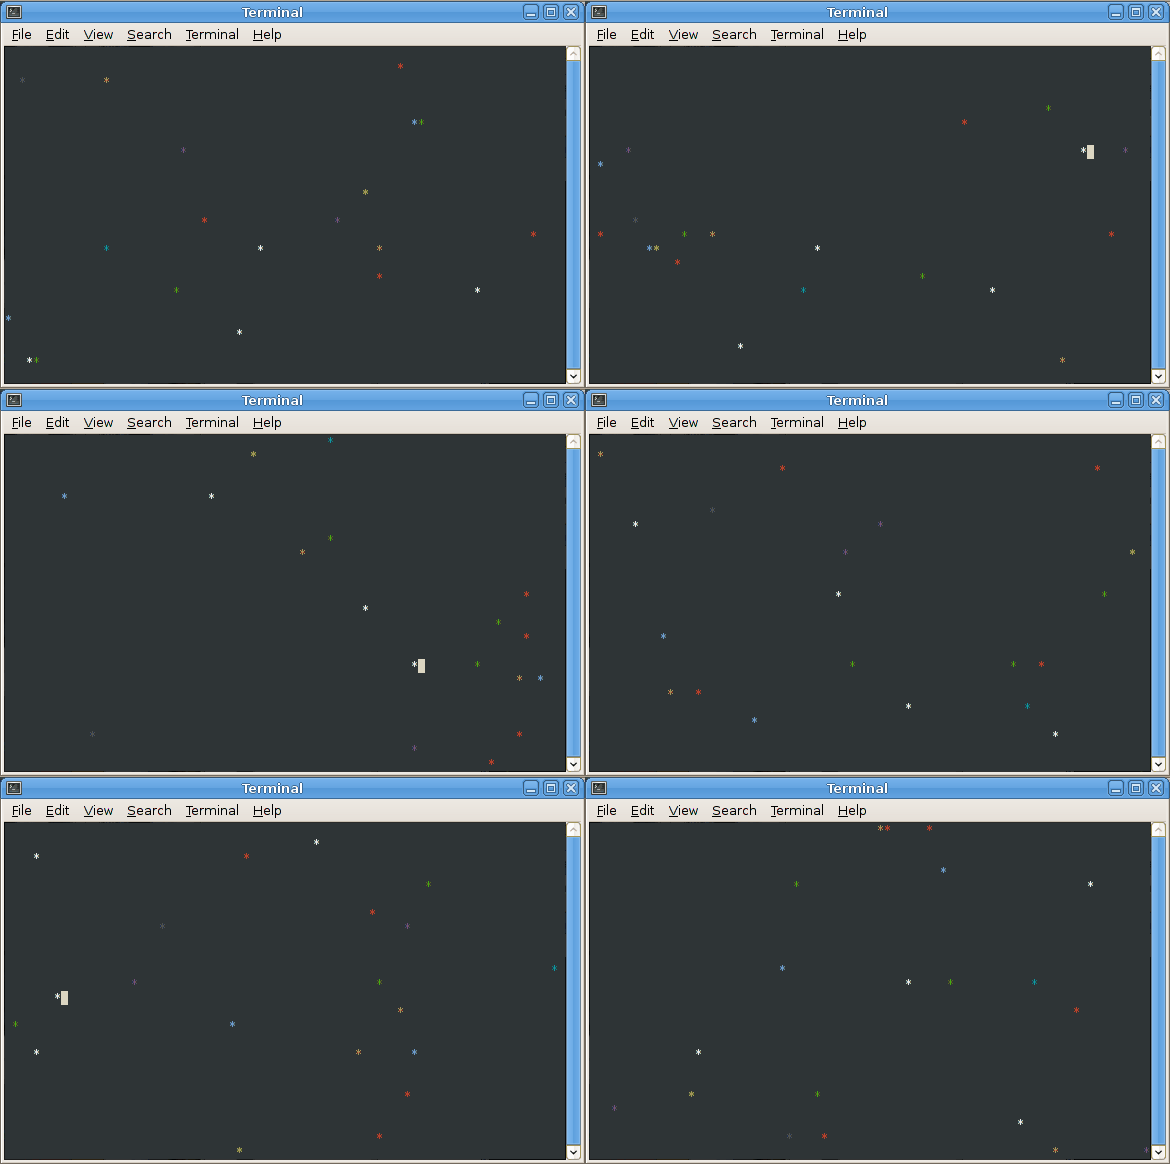
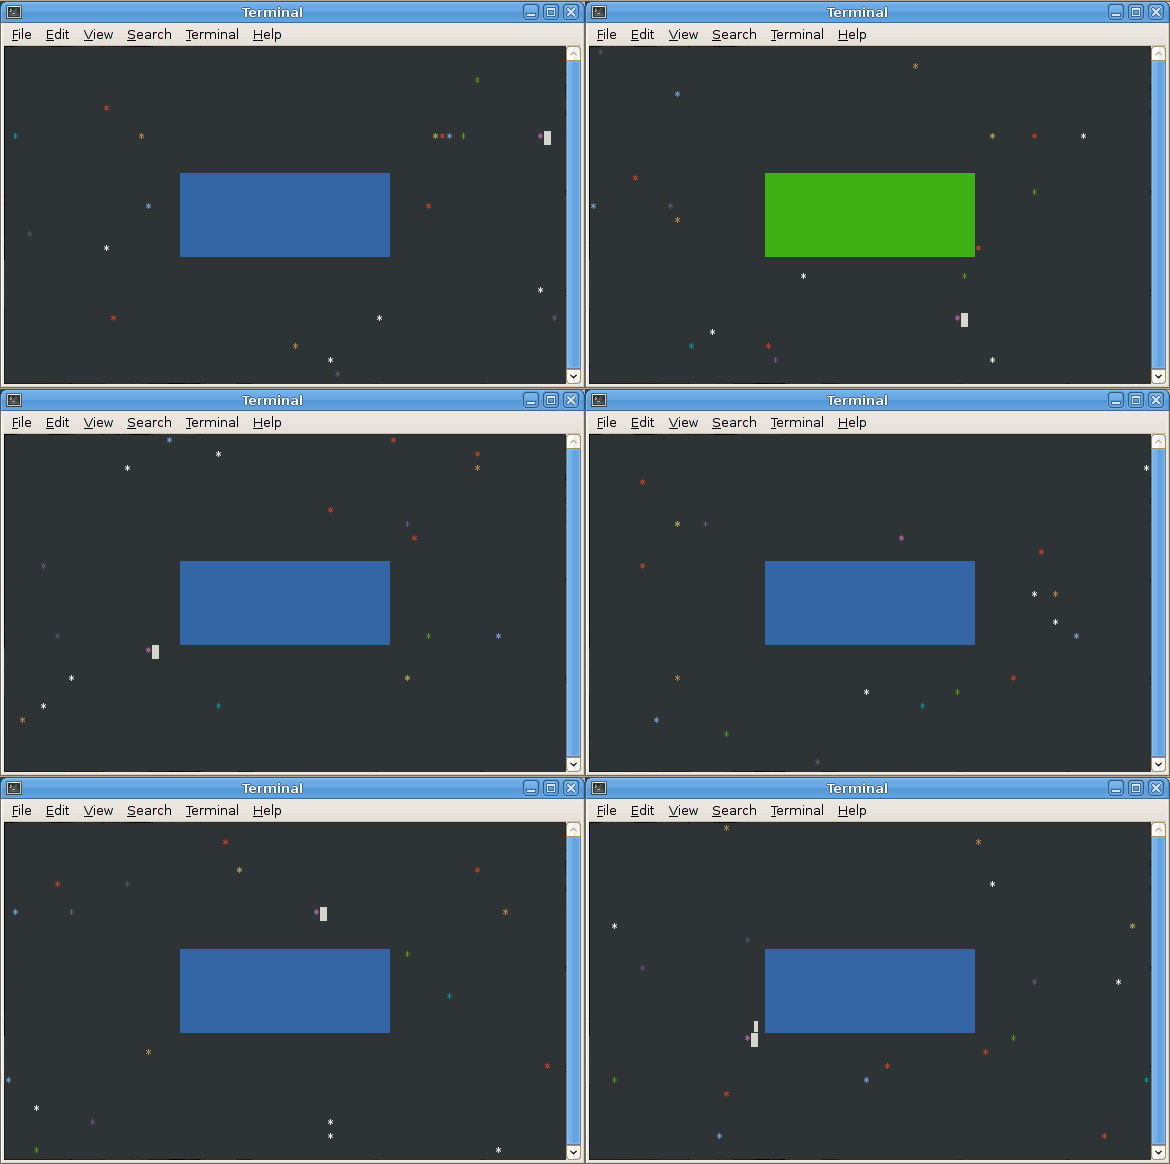
In this lab, we will turn the bouncing character animation into a simulation of multiple particles moving with arbitrary directions/velocities.
Getting Started
As always, you may refer to Lab 1 if you need a reminder about how to start the Cygwin Bash Shell or Notepad++.
Begin by downloading CS101_Lab25.zip. Save the zip file in the H:\CS101 directory.
Start the Cygwin Bash Shell and run the following commands:
cd h:
cd CS101
unzip CS101_Lab25.zip
cd CS101_Lab25
Start the Notepad++ text editor. Use it to open the files
H:\CS101\CS101_Lab25\Boing4.cpp
When you are ready to compile the program, in the Cygwin window type the command
make
To run the program, in the Cygwin window type the command
./Boing4.exe
Your Task
The task is similar to Lab 19, Lab 21, and Lab 23, in which you implemented a bouncing character animation.
In this lab you will implement an animation of an arbitrary number of bouncing characters, which we will call particles. The particles can have arbitrary positions and directions/velocities. You will use floating-point values to represent positions and velocities, allowing more realistic motion.
The lab has two parts. Make sure that you at least finish the first part. Do the second part if you have time. (It’s pretty awesome.)
Part 1
The goal of the first part is to simulate multiple particles:
[Note that the above animation repeats after 60 seconds.]
Each particle is represented by an instance of the struct Particle type. The struct Scene data type should declare a field which is an array of struct Particle elements. The array should have NUM_PARTICLES elements.
Approach
Start by implementing two functions for the struct Point data type:
void point_init(struct Point *p, double x, double y)
Initialize the Point pointed-to by the parameter p so that its x and y fields are set to the values in the parameters x and y.
void point_move(struct Point *p, double dx, double dy)
Change the x and y fields of the Point pointed-to by the parameter p by adding the values of dx and dy, respectively.
Next, add fields to the struct Particle type. It should have:
- a struct Point field to represent the position of the particle
- double fields to represent the horizontal and vertical components of the particle’s velocity (i.e., dx and dy)
- an int field to represent the color of the particle
Implement the following functions forthe struct Particle data type:
void particle_init(struct Particle *p)
Initialize the Particle pointed-to by the parameter p by setting a random position. The x coordinate should be in the range 0 .. 80, and the y coordinate should be in the range 0 .. 23. Note that these values should be floating point. For example, you can generate a double value between 0 and 80 using the following code: (rand() % 8000) / 100.0. The horizontal and vertical components of the particle’s velocity should be assigned a random value in the range -1.5 .. 1.5. The expression ((rand() % 300) / 100.0) - 1.5 generates a double value in this range. The color should be an integer in the range 1 .. 15.
void particle_render(const struct Particle *p)
Draw a character at the appropriate position and with the correct color for the given particle. Note that you will need to cast the particle’s x and y coordinate values to int values when calling the cons_move_cursor function.
void particle_update(struct Particle *p)
Update the particle’s position by adding the horizontal and vertical components of the particle’s velocity to its x and y coordinates. If the particle would move off of the screen, change its velocity to deflect it back into the boundaries of the screen. Suggested approach: create a struct Point containing the next position of the particle. If the next position is out of bounds, change the dx and/or dy values appropriately.
Add a single field to struct Scene: an array of struct Particle elements. The length of the array should be NUM_PARTICLES.
Implement the following methods for the struct Scene data type:
void scene_init(struct Scene *s)
Call the particle_init function on each particle using a loop.
void scene_render(const struct Scene *s)
Call the particle_render function on each particle using a loop.
void scene_update(struct Scene *s)
Call the particle_update function on each particle using a loop.
Finally, add calls to scene_init, scene_render, and scene_update to the main function.
If everything is working correctly, you should see an animation like the one shown above.
Part 2
The goal of part 2 is to add a rectangular obstacle to the scene:
[Animation repeats after 60 seconds.]
The particles should bounce off the obstacle, so your collision detection code will need to check for this possibility.
Approach
Start by adding fields to the Rect struct type. There should be two fields of type struct Point: the first has the minimum x/y coordinate values, and the second has the maximum x/y coordinate values.
Next, implement the following functions for the struct Rect data type:
void rect_init(struct Rect *r, struct Point p1, struct Point p2)
Initialize a struct Rect by initializing its points to the ones given by the parameters p1 and p2.
bool rect_contains_point(const struct Rect *r, struct Point p)
Return true if the given point is inside the given rectangle.
Next, add a struct Rect field to struct Scene. Initialize this field in scene_init so that it is in the middle of the screen. Note that you will need to make sure that none of the particles is initially inside the rectangle: use a loop to repeatedly call particle_init until the particle is not inside the rectangle.
Next, modify the particle_update function so that it takes a pointer to a struct Rect as a second parameter. In the collision detection code, check whether the next x/y position of the particle would be inside the rectangle. If so, deflect it appropriately. This can be done as follows:
- compute updated particle positions using horizontal deflection, vertical deflection, and both horizontal and vertical deflection
- if the horizontally deflected next position is not inside the rectangle, then only horizontal deflection is needed
- if the vertically deflected position is not inside the rectangle, then only vertical deflection is needed
- otherwise, both horizontal and vertical deflection are needed
Finally, modify scene_render so that it draws a solid rectangle representing the rectangular obstacle.
Note that in the animation above, I also added code that changes the obstacle’s color from blue to green when it is struck by a particle.
Submitting
When you are done, run the following command from the Cygwin bash shell:
make submit
You will be prompted for your Marmoset username and password, which you should have received by email. Note that your password will not appear on the screen.
Important:
You must submit your work before leaving class. If you do not submit work, you will not receive any credit for the lab.


