This page contains a step-by-step guide through the configuration of CLion.
Configure Toolchains in CLion
The first time you run CLion you’ll need to configure a variety of settings to get your IDE ready to compile and run your projects. Setup will differ depending on your operating system. This guide is for Windows 11 running WSL2 with Ubuntu 24.04 LTS installed.
-
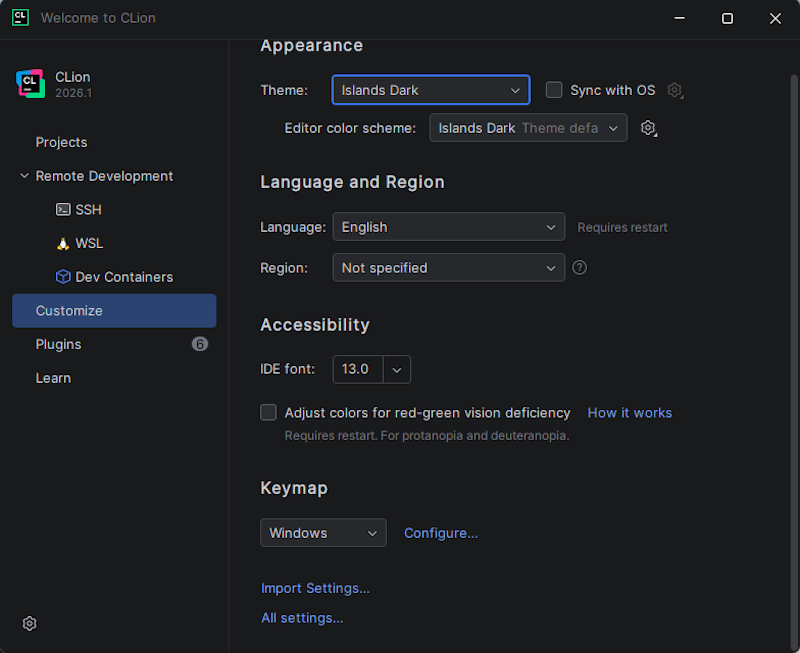
Step 1: Select the Customize menu option in the left sidebar. Then click on All settings… at the bottom of the new dialog box.
-
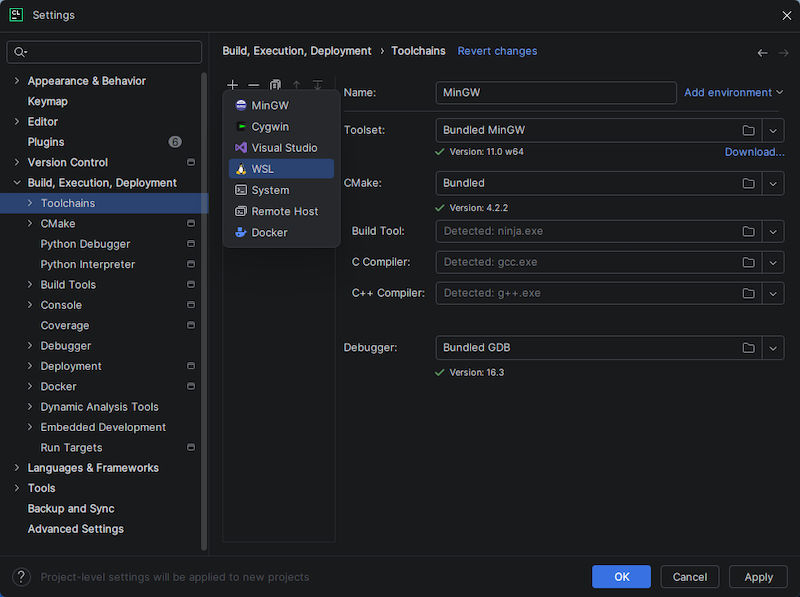
Step 2: In the Settings dialog box that opens, expand Build, Execution, Deployment, and then select Toolchains in the left sidebar. At this point you may or may not have any toolchains setup. Click on the + symbol near the top of the dialog box and create a new WSL toolchain.
-
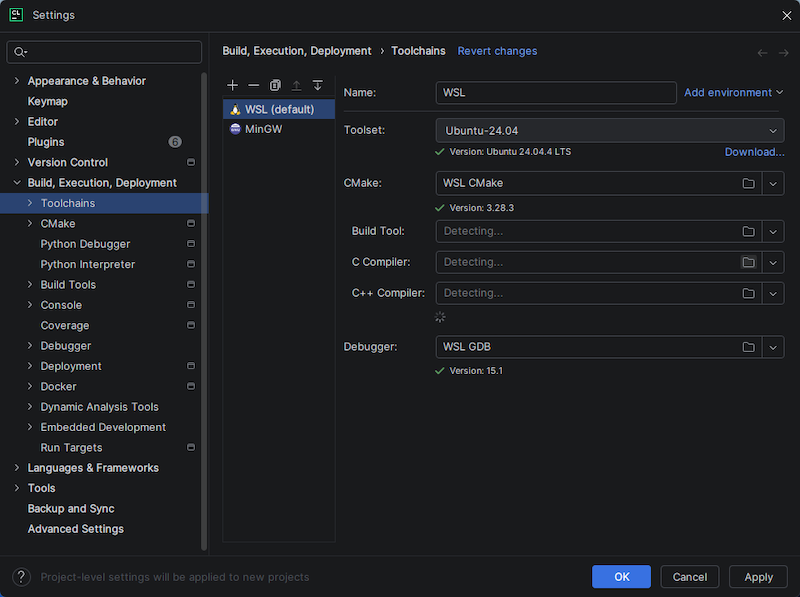
Step 3: All the values for your new WSL toolchain SHOULD autopopulate. If they don’t, make sure you installed your Ubuntu Linux VM properly. Verify that your settings match those shown in the image below. If you have multiple toolchains installed, move your new WSL toolchain to the top of the list so that it becomes the default toolchain. When done, click Apply.
-
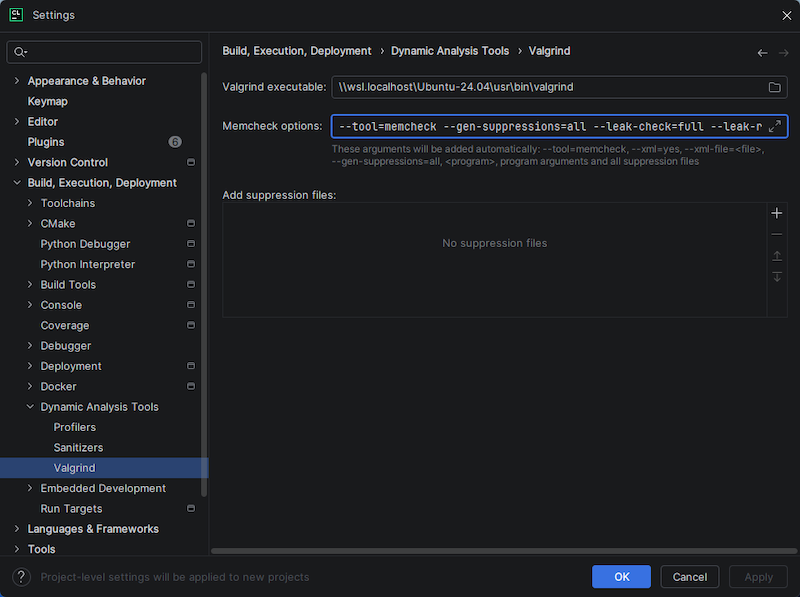
Step 4: In the left sidebar, expand Build, Execution, Deployment, then Dynamic Analysis Tools, and then select Valgrind. Copy and paste the following text into the Valgrind executable text field. NOTE that if you installed something other than Ubuntu-24.04, your path will be different. Click on the folder icon in the right of the text field and browse the filesystem to find your installation of valgrind. It will be in a similar location to the example below.
\\wsl.localhost\Ubuntu-24.04\usr\bin\valgrind -
Step 5: In the same Valgrind settings window, copy and paste the following text into the Memcheck options text field and overwrite the default settings.
--tool=memcheck --gen-suppressions=all --leak-check=full --leak-resolution=med --track-origins=yesYour Valgrind settings should look similar to the following when complete. Click Apply to save the settings.
-
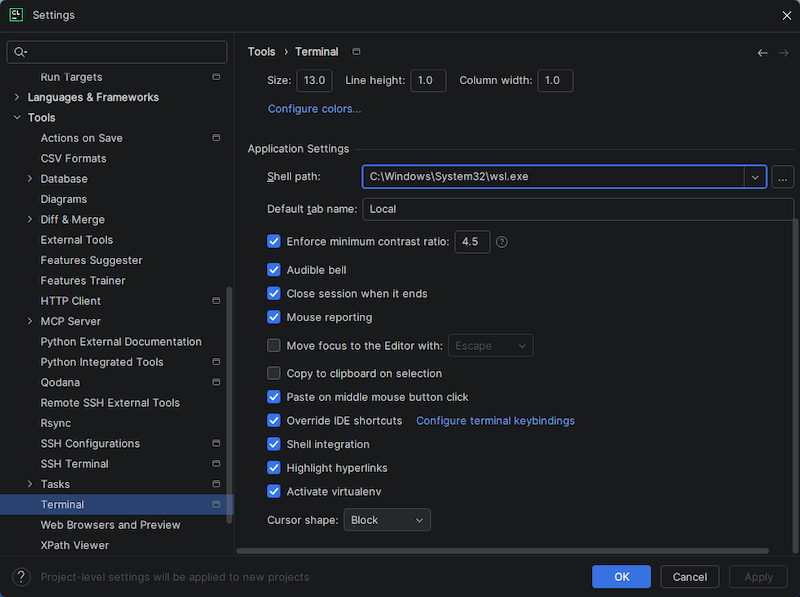
Step 6: In the left sidebar, expand Tools and then select Terminal. Scroll down until you see the Shell path setting. Copy and paste the following text into the Shell path text field and overwrite the default setting:
C:\Windows\System32\wsl.exeYour Terminal settings should look similar to the following when complete. Click Apply to save the settings and then OK to exit the Settings menu.
Continue to Final Part: Install YCPCS Marmoset Plugin
